We have moved to thamjiak.com! Please use the search box there to find your current post ->

Tham Jiak: My Recipe
Tham Jiak means in some way "love to eat" in Hokkien. I am a Malaysian Hokkien and truly love to eat.
Showing posts with label My Recipe. Show all posts

Friday, September 08, 2006

Smile!


Let’s see. Where do I start? There is so much to tell about a friend of mine, which is extraordinary in her own way. A girl I had mentioned quite a number of times in this blog. Y is a girl of exuberance. A girl who has a sweet smile on the face at all times. If I have to sum her up in one word, smile would would be it. She is smiling when she is walking, she is smiling when she is talking and she is even smiling when she is singing. Yes, she is a girl that smiles and brings joy to whoever she is with.

I have known Y more than 10 years ago, our passionate relationship kicks off when we both found ourselves sharing the same love for basketball. Then our friendship was forged deeper when we had the same class at 14, where we formed 1984; where we had tons and tons of laughter, excitement and adventure.

Our friendship was brought to the next level as we both came to the strange world of KL together, looking for more to life after the peaceful years of schooling and good food at the haven we are in. I call it fate that we both end up in the same college and soon end up as room mate, then to condo-cum-studio-mate and till now, housemate and not to forget, also my band mate. She had always been with me in KL, so to me; she is like my family here. I know I will always have someone to look to, to confide in and to share with, in times joy or turbulence.

I wish there is more I can tell about Y, as believe me she is not as simple as that. But somehow it seems impossible to mention everything about her. I can confidently say that she had always been a great friend, who never failed to be there for me when I needed and will always still be there for me even when I don’t need it. Confusing as it may seems, but believe me, she would understand what I mean. Love you Y, and have a great year ahead as a girl with the age-of-double-number. Cheers.
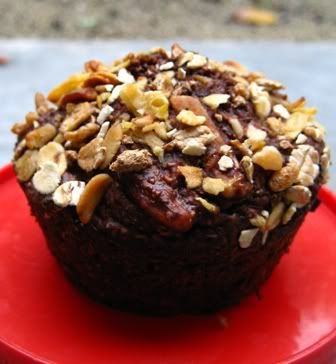
Extremely ChocolateY Chocolate ‘Kou
Adapted from Molly, Orangette


I made a cake for Y, specifically with all her preferences. I forgot to mention that she is a girl of acquired taste, extremely stubborn (which means if she does not like one thing, she would not ever change her mind bout it, no matter how much you try with all sorts of variation), a bit of a traditionalist and have a strong degree of liking to chocolate (who doesn’t?), and with certain specific no-no. She does not eat anything which is too bitter (thus degrade the idea she is addicted to chocolate, lets just add that she loves sweet things too), or anything with nuts, raisins or just anything round, hard or soft or whatsoever that appears in where she thinks it should not. Basically, she loves her food plain, simple and delicious. Since she has the weakness for chocolate, I decide to go all the way out to make an extremely decadent chocolate cake, which is flourless, and of course devoid of any trace of her no-nos.

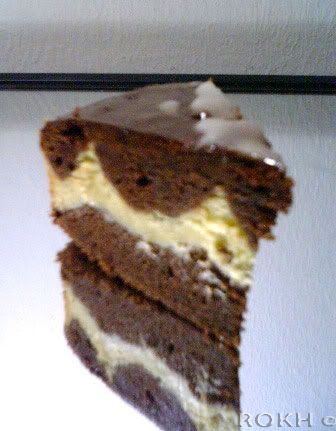
I had been attracted to this cake since the day I read it at Orangette but have yet to find the occasion for such indulgence. Now this time, Y is going to be the victim, as the result of the cake is certainly addictive. When Y and my friends bit into it, they moaned with pleasure and I am not exaggerating here. In Y's words, she mentioned that the cake does not have the texture like regular cake at all but more to like ‘kou’ (as in kuih, like a marriage between pudding and cake), thus the name I christened it.

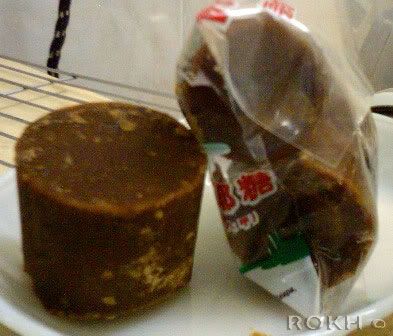
I would also recommend to use the best chocolate you can find (for me I would certainly go for bittersweet but since it is for Y, I used Vochelle cooking chocolate instead) and also the best butter, full fat kind, oh and the freshest egg around. I said this was good but I also said it was decadent remember.

200 g best-quality chocolate (bittersweet, unless for someone like Y)
200g full fat butter
220g granulated sugar
5 eggs
1 tbsp all purpose flour

Preheat oven to 180C.
Line an 8-inch round cake pan with foil.
Finely chop the chocolate and melt it with butter in a double boiler or microwave, stirring regularly.
Add sugar to the chocolate-butter mixture, beat well and set aside to cool.
Then add in the eggs one at a time, beat well with a wooden spoon at each addition (I like this traditional way, working my arms over the batter).
Add the flour and mix well.
Pour batter into the pan and bake for 25-35 minutes (mine took quite long, I covered the top half way through to avoid burning), until the top is slightly burnt but the middle is still jiggly.
Pull the cake out immediately with the foil and let it cool.
Then slowly peel away the foil, then be strong and store it away into the refrigerator for a at least a day (Molly said its better the day after and I’m not going to compromise this).
Before serving, take it out and decorate as desire to fit for a birthday girl (in my case a huge love to sweet Y).
Then slice thinly to indulge slowly (you have been warned).


Tuesday, August 29, 2006

Beating It Stiff

I believe every cook has its challenges. Every cook has its qualms. As for me there are only two things in this culinary world that always gave me the apprehension. It is the yeast and the beat-till-stiff-peak thing. Oh yes, shamefully, as a cook, I have yet to even bake a bread myself, the thought of culturing a colony of yeast and then kneading them together and then hoping they would multiply and make your dough grow fat, seem so daunting, impossible even. But then, yesterday I had just overcome the other one of my culinary shortcomings, though not without some glitches. Before this, I had failed before in my attempt unknowingly, when I baked the birthday cake for my Ah Ma, resulting in a dense short sponge cake. This time however, I had finally beaten those stubborn egg whites stiff and baked myself a chiffon cake! Hurrah!

As a kid, I have always loved chiffon cake (similiar to sponge cake but lighter and taller). My
Ah Ma used to bake a mean pandan chiffon cake. She can make them rise really high in her huge chiffon pan, which she had passed on to me and which sadly, could not fit into my mini oven. Besides, here in Malaysia, chiffon cake is really popular among the locals. The most popular one is of course, the pandan flavoured chiffon cake then next is the orange chiffon cake. My mum used to buy it a lot too for me to bring to school last time, and I absolutely love the soft texture and the soft feeling of it. One can eat the whole chiffon cake without feeling you had eaten a bomb. In case you’re wondering, I have yet to try to eat the whole cake myself, ha-ha. Nowadays in KL, we can find chiffon cakes easily in the Pasar Malam (night market) and also at any of the hypermarkets like Tesco and Carrefour, which gives even better prices. Every time I wanted to buy them I would stop myself and then think “hey, you can easily bake one at home!” In the end I would end up deprived of them, cursing myself all the time. After so long, I guess it finally paid off. I succumbed to temptation, flipped through thousands of chiffon recipes, choose a promising one, braced myself and finally baked one.

Since this is such a well-loved light dessert for the Malaysians from eons ago, I am submitting this entry to Babe's Merdeka Open House 2006! Though this cake can still be found easily outside, I believe it is no longer the common bakes of Malaysian households, in a way it is a long forgotten recipe. Now with this easy and adaptable recipe, I hope everyone will bake one their own, just like how my Ah Ma would and make some kid really happy. Do look out for this wonderful event as Malaysia celebrates its 49th birthday.

All these while, I had always been used to the idea of pandan or orange chiffon cake, until I ate one cheese chiffon cake baked by C, a fellow
KC during our first gathering. Then it dawned on me that chiffon cake is actually really versatile, and could be flavoured in anyway you would want to. In fact we had been having the chocolate sponge cake in our famous blackforest cake all these while unknowingly. Chocolate seems like a good choice, but no too normal, then I do not have any cheese in stock (not after I just baked off a batch of overdue ones), then suddenly I stumbled upon this recipe, from Jo’s Deli Bakery for green tea chiffon cake. now this is certainly interesting. I love green tea, as drinks and also especially in ice cream. It is certainly an exotic taste, which I found really versatile in a lot of things. This green tea flavour took the chiffon cake up to another level of sophistication altogether, setting it apart from the usual ones. The green colour can be deceiving, as my mind would keep tricking me that I am eating pandan chiffon cake, but when I chew on the soft cottony cake a few times, and revel a bit in the flavour, then the green tea will come through and oh wow, I’m lost for words. Let me go try another one (yes it's an excuse) and come back with better words to describe it.


Green Tea Chiffon Cake

This recipe is actually for a fancy birthday cake, all dressed up with whipped cream and green tea powder, but I just took the basic sponge cake and give it a try. After all this is about me and the egg whites war, so a basic chiffon cake will do. I do not have a chiffon cake pan, but I heard before that it can be baked in the usual round cake pan so there goes the pan problem. Well, I finally manage to beat my egg whites stiff peak, it stands on the tip of my beater and I can turn the bowl over my head without being splash white (
Jamie’s way). Then I carefully fold in the green tea portion, taking care not to expel all the air I had whipped in. Now everything seems find till this step, but my one mistake is, I believe, my oven was too hot when I put it in. Before that I had been baking a chocolate cake at higher temperature, though I had lowered it down for a while before putting in the chiffon, apparently it is still hot, half of the top blacken considerably slightly after half time and that part did not rise as much, this is because my temperamental oven are usually hotter at the inner left, I don’t know why. Another thing to note is I used a 9 inch pan, instead of the 8 inch that the recipe called for, that is why my cake was shorter and with that it baked in a much lesser time, which luckily I check with a toothpick and took it out sooner. Oh ya, I also took care not to peak until only the last quarter of baking time.

A few things that I noted from this recipe are, first I would dissolve the green tea powder in the water, then only add to the flour mixture. As for the egg yolks, it should be beaten first, then add with the oil and beat further to mix well, as both are of the same kind, it should be easy and then add to the flour mixture too. This way it will be easier to incorporate everything together, which I had a hard time earlier. I would be reflecting these in the recipe.

Next time, I would also go back with the 8 inch pan and bake at the right temperature (until I found how to deal with my oven), and if possible get myself a chiffon cake pan for better heat distribution, in case you don’t know, chiffon cake pans have a tube in the middle for the heat distribution along with the sides of the pan. Now that I had finally successfully baked chiffon cake, and love it, I would be baking more soon, so definitely worth the investment (note to self). Look out for more of my chiffon cakes adventure, I would still be going back to this green tea a lot, but of course I will be experimenting on other flavours too, yum!

100 g cake flour
½ tsp baking powder
½ tsp baking soda
45g castor sugar
4 egg yolks
50g oil (I used olive)
70g water
2 tsp/3g green tea powder

4 egg whites
50g sugar
¼ tsp cream of tartar

Preheat oven to 170C
Sift flour, baking powder and baking soda into a bowl.
Add in the sugar.
Beat the egg yolks, then add in oil and beat well again.
Dissolve the green tea in the water.
Stir in both the oil and water mixture into the flour mixture.
Stir until incorporate well.
In a separate clean bowl, whip the egg whites and cream of tartar till bubbly.
Gradually add in the sugar and whip at high speed until stiff peaks form
Fold 1/3 of the egg white into the green tea mixture to enlighten it
Then pour this mixture into the remaining egg whites and fold gently to combine
Pour into a 8 inch pan and bake for 40-45 minutes
As soon as the cake is removed from the oven, invert the pan and let it cool
Once cooled, run a knife around the sides of the pan to remove the cake

Update: We devoured (virtually) all the food at Babe's Merdeka Open House 2006!

Monday, August 07, 2006

It's Weekend Again

Well a week just flew by in a breeze. It is weekend again. Although I know the weekend breakfast blogging is meant for, well weekend cooking, which means taking more time to prepare and enjoy breakfast. In oppose, I either sleep late on weekends or eat out. On weekdays though, I prefer to enjoy some healthy homemade breakfast before going to work. Knowing that I have a lovely breakfast waiting for me seems to be a pretty good motivation to get out of bed. Now that is the best alarm clock in the world, don’t you agree? So I had this really good, healthy and substantial muffin recipe from 101 cookbooks really long time ago in my to-do list, which I cannot resist sharing it here. I can’t seem to find this post anymore in that blog, so I could not link it, but I will share my adapted version here though.

This muffin turns out great the way I imagine it would be, slightly chocolatey, with good thick texture, occasional encounter on soft raisins and crunch on the nuts. To top it off, it uses all the readily available ingredients in your pantry and is really versatile for substitutions accordingly. These huge muffins can only keep for bout 3 days in room temperature but fret not, it freezes really well, so far I still have 2 left in my freezer and it is still keeping well. Whenever I wanted to have it the next day for breakfast before work, I would take one out the night before, put it in a tall container and leave it in room temperature, and by the time I wake up in the morning, it is ready to eat. No better reason to wake up than breakfast; pour a cold glass of milk and enjoy with this yummy muffin. Eating one is enough to fill you up for the whole morning, without feeling as if you ate too much. It’s really good and healthy too! Give it a try.

Whole Wheat Banana Chocolate Muffins

I had, as usual, adapted the recipe to suit whatever I have or can get my hands on. Anyhow, feel free to experiment. Besides, I had halved the recipe to make do with my mini oven, thus there are cases like half a ¼ cup, which I hope you would understand, I advise to double the recipe since it freeze so well, for rainy days. The oat and bran cereal topping is optional, but it does give the muffin a novelty look besides adding more crunch and flavour to it. You can use whatever oat bran cereal you have, or even granolas. Remember to push it down slightly though when you sprinkle on before baking, as quite an amount of mine fell off during removal.

1 cup whole wheat flour
1.5/4 tbsp brown sugar
¼ cup unsweetened cocoa powder
1 tsp baking soda
1 ½ overly ripe bananas, mashed
¼ cup low-fat yoghurt
1 egg white
1 tsp vanilla extract

¼ cup of nuts (walnuts, almond, pecan)
¼ cup of raisins (original calls for currants)
1.5/4 cup unsweetened shredded coconut

Oil for preparing the pan
Oat and bran cereal for topping

Method:
Preheat oven to 180C/350F
Lightly oil a 6 hole muffin pan (I used an oiled tissue to wipe it)
Combine flour, brown sugar, cocoa and baking soda together.
Add in mashed bananas, yoghurt, egg white, vanilla, nuts, raisins and coconut.
Stir until combined.
Pour batter into the muffin pan and top with the oat bran cereal.
Bake about 25-35 minutes, or tooth pick is clean when inserted.

Makes 6 large breakfast muffins

P/S: I just bought a new camera, Canon Ixus 60! I am so ready to take lovely food pictures now. Do you notice the clearer and better muffin pictures? I must admit I need more practice though, as I am still testing out my camera’s various functions and getting use to its ability. So look out for more pictures for you to drool on, I hope ;)

Sunday, July 23, 2006

What Breakfast Means

Since young, my mum had always enforced the importance of breakfast to us, my sister and me. Once someone told her that an egg a day would make your children grow up big and smart!(I can testify that the former is wrong, judging from my height, but I hope the latter is right ;) So, every morning for most of my pre-school, she would make half boil egg for us and a glass of Milo (a popular Malaysian chocolate malt drink). We practically eat the same breakfast everyday for school days until one point I am revolted with the smell of half boiled egg (which suddenly smell really raw) and my mum would insist I finish them. So every morning I would pinch my nose (I learnt from somewhere that we taste through our nose, ha-ha, cheeky me) and down the egg and then quickly wash down with milk or Milo. At one point my sister and I take up a banner and make a riot to sanction a ban on it. Ok, maybe a bit exaggerating but you get the idea. Finally we got our ban and moved on to other breakfasts. But knowing my mum, she would go the fast and easy way, and most of our breakfasts are then bread with jam, or peanut butter and so forth. Soon it got even lazier where my mum would just get chocolate milk drink in cartons.

That was a long time ago, and later I came to stay by myself in KL and soon found out how is it to live on my own. Many of my mornings went without breakfast, maybe an occasional cereal and fresh milk, but that’s about it. Most of my university days have me waking up when the sun is already halfway across the sky. Thus breakfast took a back seat in my life.

Now, as I grew up more and got into culinary adventures and food craze, I learnt that how important breakfast is (yes mum, I finally understand), and always look forward to have a good breakfast to
kick start my day. I even got the penchant back for half boiled egg, especially with toast and a good cup of coffee, kopitiam style. Nowadays, getting into the life of working, I need a good coffee to boost my day. I am now always in search for good and healthy breakfast recipes as I want to go home made style. of course I take into account on time and also ease of eating, as I would sometimes need to have my breakfast in the car. Life is all about rushing isn’t it?

Anyway, nowadays I seem to surf a lot on breakfast recipes and was mostly interested in the healthier options such as lower fat, higher nutrients and so forth. I had made quite a number for my everyday breakfasts before I got to work, and so you can be sure of more breakfast recipes to come. To me breakfast is something of a ritual, something exciting to look forward to the night before and the reason for you to get your bum off the bed in the morning. I wouldn’t call it a day without breakfast, won’t you too?

Ginger Molasses Cake
(adapted from Williams Sonoma)

I love ginger. It is one of the most useful spice that I ever came about. In Asian cuisines, it mostly used in savouries, especially with meats and in some sweet soups. Since our ancestral times, we know the goodness of ginger, of its medicinal properties, such as aiding in digestion after a heavy meal and also others such as aiding in nausea and other illness. This ginger cake that has crystallized ginger in it is something foreign to us Asians, Malaysians that is, but somehow I am attracted to it, imagining the flavours in my mind. This cake is really light and soft, despite the low fat content and the ginger flavours is just amazing. Sadly though, J did not enjoy it as he felt that it is weird and my housemate Y thought it was chocolate cake at first and got a surprise once she bit into it. She could not exactly guess the taste but once enlighten, she left the cake alone too. Well, I guess I am the only one having ‘foreign’ taste here. Don’t be put off though, if you’re a ginger lover and you love the thick heavy taste of molasses, this cake is definitely good eats, as it is really tender, moist, gingery and full of flavour from the spices.

3-4 Tbs. unsalted butter, at room temperature
1/4 cup brown sugar
1/2 cup molasses
1/2 cup minced crystallized ginger
2 eggs, at room temperature
1 1/2 cups cake/superfine flour
1 tsp. baking soda
2 tsp. ground ginger
1/2 tsp. ground cinnamon
1/2 tsp. ground allspice
1/4 tsp. ground nutmeg
1/2 cup low-fat yoghurt

Preheat oven to 180C. line a 9 by 4 inch loaf pan with baking/parchment paper.
Beat the butter and sugar till creamy and fluffy.
Stir in molasses and crystallized ginger.
Beat in the eggs, one at a time.
In another bowl, sift together flour, baking soda and the spices.
Stir the flour mixture into the butter mixture in 3 additions, alternating with yoghurt, starting and ending with flour.
Mix until smooth.
Pour into prepared pan and bake in oven for 45-50 minutes.
Transfer to wire rack and let it cool for 10 minutes or so.
Then turn the loaf out onto the rack.
Cool completely before storing.
It tastes divine warm out of the oven, still good in room temperature but it would turn hard once refrigerated. It keeps well for about 5 days in air-tight container and room temperature; if it is still around.
Now have a few slices and call it a day!

Serves 10-12.

P/S: This post is added into Nandita's Weekend Breakfast Blogging over at Saffron Trail. Do look out for the forthnightly roundup!

Update: The roundup is here, Part 1 and Part 2. More food to wake up to!

Saturday, July 15, 2006

It's Getting Hot in Here

If you guys have noticed, I had slowed down a lot on blogging into only bout once a week. I had just started my new job, and still in process of getting the hang of things and in the midst of training. So do bear with me as I have a lot of wonderful good eats waiting to share here.

Anyway, this time I am here to post for Barbara’s The Spice is Right Event, this time with the theme ‘It’s too darn hot!’ Barbara is so right about the case that we Asian love to eat hot and spicy food even though it is darn hot out there. Why? We are mad people who like to sweat their shirt out in some road-side stall with the heat up to 38 degrees. We also like to burn our tongues when we eat and end up with red puffy lips all day. We also happens to enjoy end up with a burning sensation in our stomach all day long and maybe a big business trip to the toilet. Well, there are many reasons we Asian eats darn hot chillies in the heat, but one holds true for everyone is that it is just plain good eats.

The chili condiment that I am going to feature today is called the Sambal Chilli. It is usually served alongside the famous local dish called nasi lemak, which is the unofficial Malaysia national dish, competing with char kuey teow. Nasi lemak holds much stronger position to me as it is enjoyed by all races, young or old. Somehow I believe that it evolves from a simple Malay dish to various types of serving, somehow adapted by other cultures. There are Indian and Chinese serving nasi lemak here in Malaysia, both with their own distinctiveness, or maybe not, what is real nasi lemak anymore anyway? The basic is the rice that is cooked in coconut milk and pandan leaves for fragrance. For now there are two popular types, one which is in small servings wrapped in banana leaves, the usual breakfast fare for our locals here. As for the bigger serving style, of huge amount of lemak (fatty) rice, and lots of sambal to go with it along with some fried ikan bilis (anchovies), groundnuts and cucumbers, sometimes with egg, hardboiled or sunny-side-up and fried chicken. This is the usual mamak style fare that we eat it anytime of the day, which I called it fast food the Malaysian style.

For me, as I grew up in Taiping, with not much of wondering around and not much of mamak stalls available, I have not been really expose to the wonders of nasi lemak. When I then came to KL I started to try it out both the breakfast and the mamak style. To me, the best of the nasi lemak comes not only from the coconut milk rice, but the sambal that goes with it. It must be hot with enough kick, while slightly sweet and tangy. Now I would share with you one fool-proof and darn hot

Sambal Chilli

I got this recipe from KC, and it yields quite a large portion of sambal, thus I had scaled it down by half when I did it. But if you have a large family to feed, I would definitely recommend you to make the whole batch since you are doing the same amount of job and it keeps really well too. According to Gina (founder of KC and the one who shared this recipe) it can last for 1 month in room temperature (away from sunlight), 2 months in the fridge and 6 months or longer in the freezer! How cool is that? As for me, after eating bout half the batch, I took the liberty by adding fried ikan bilis (anchovies) to it for the nasi-lemak-style sambal which I’m not sure would the shelf life be shorten, but I remembered keeping it for quite sometime in the fridge. As the recipe that follows, most of the ingredients are just for guidelines, you can add more or less of whichever fancy you most. I had also reduced the sugar amount as I like my sambal more hot than sweet. Amount of oil is also adjustable, some like their sambal drowning in it, but as for me, I am a little health (or weight ha-ha) conscious, thus I reduced the oil amount quite a bit and it still turn out great.

100g red chilli
2 pcs of assam keluk/gelugor (tamarind slice)
100g sugar
10 shallots
6 cloves of garlic
250ml tamarind pulp juice (or dilute tamarind paste in hot water)
80ml oil
2 lime, juiced

Grind together the chillies, onions and garlic into a smooth paste
Add in sugar, tamarind juice and assam keluk to mix
Heat up the oil in the wok
Add in the chilli paste to cook, turning down to low heat and continue to stir fry the paste
Cook until the paste turns dark and starting to dry out
Turn off the heat and let it cool completely
Stir in the lime juice
Store in tight jars

For sambal ikan bilis:
2-3 handfuls of ikan bilis (anchovies)
Oil for frying

Heat enough oil for frying in the wok
When smoking hot, throw in the ikan bilis and fry until crispy
Take care not to burn it as it can turn from crispy to burn pretty fast
Dish out and let drain
Then stir it into the sambal, mix well
Store in tight jars again

Yields 300g of darn hot sambal

Suggestions:
Serve with nasi lemak
Goes along really well with stir-fry noodles too like my pad thai
Kicks up a notch on any regular or chinese fried rice
Leave out the ikan bilis to go with char kuey teow

Sunday, July 09, 2006

Sweet Goodbye

If you all have been following this blog, you would be familiar with L. Yes, she had been my guest blog a few times, writing about her food adventure in Penang and also her great research on Chee Cheong Fun that had caught so many’s attention. L came up to KL for internship the last 2 months, which started our food whore out there, once I wrote about it, many more in my archives yet to be publish, due to more food eating and enjoying life. It had certainly been fun when she’s up here. We got around quite a bit, pretty adventurous with our food endeavour, sometimes burning holes in our pockets, yet we would still go out and do it again.

Let me give some introduction about L. She had been one of my longest friend, and also a fellow 1984. I’ve known her since 11, and from there we just clicked and our friendship had grown since then till now. We have a lot in common, sharing interests in writing, books, dreams and of course food. It is not a wonder we are so close.

Anyway, we had a mini farewell for her last Tuesday at our new home, with our housemates and a few close friends. She promised to leave a goodbye note here, which I have yet to receive from her, and would update when I do. We had steamboat party, which has the usual array fresh food, and clear soup which would then later be turn to tom yam to finish it off.

When I got home from work (oh, yes I started, it was great), I quickly got to the kitchen to make dessert for the party. Guess what I will be making? It’s bread pudding. This dessert is easy; one can prepare before the party starts, leave it in the fridge and bout 1 hour near to the end, take out the bread pudding and bake it, then serve right out of the oven. This is one time I made something with my ‘own’ recipe, adapting from here and there, and since I am making it specially for L, I am naming it

Farewell Bread Pudding

I had about half a loaf left on apricot and raisins bread that I bought last week for my daily alone breakfasts. After a few days, I got tired of it and chuck it into the fridge. Therefore came the inspiration to use up this bread when the party came. This is actually the Gardenia Toast 'em fruit breads, if you live in Malaysia you’ll know which one, and it can be bought just about anywhere. They are good to eat just like that but I love it especially when toasted, with a good cup of coffee. Now, I found out that making it into this pudding was really good as well. Browsing through various recipes, I encountered most using whip cream, which if you had notice, does not ever appear in my recipes. Not to say I do not like it, maybe it’s the high fat content, maybe it’s the unavailability and also maybe it’s expensive. Therefore I had to adapt and fine alternative. To me, evaporated milk would be good, thick milky taste yet light and slightly creamy. This following recipe is my adaptation from few recipes, which I just go with hunch this time with the milk ratios, since I did not use cream and phew, it turned out great. At first it would seem to wet but trust me, once baked, all the liquid will absorb into the bread, making it pudding like. During baking it would puff up so nicely making one happy, but after cooling, it will shrink down. My heart nearly jump to my throat at the sight, there goes my dessert, as it also looked really burnt on the top and sides. There is no turning back for me as everyone at the steamboat table is waiting. There you have it, the adrenaline rush of a first try, serving to a bunch of people. Despite the hard look, once you spoon on it, it is actually soft inside, while crusty on the outside. The sugar topping gives it a deeper taste, some guessed it was gula Melaka, and with some hint of cinnamon. No one guessed the presence of alcohol, but I’m sure that is where the complex flavour came from. My first try and all my guests are happy about dessert, though it took some initial coaxing to try, as all of them have never tried bread pudding before. One of them even expected a flan instead. Well, a nearly empty dessert bowl signifies success I guess.

8 slices day old bread
3 tbsp butter melted

3 eggs
1 cup evaporated milk
1 cup low fat milk
4 tbsp of sugar
½ rsp vanilla essence
½ tsp cinnamon

½ cup raisins (I used a little lesser because my bread came with raisins)
4 tbsp brandy

2 tbsp fine jaggery powder (or fine brown sugar or palm sugar)

Soak the raisins in the brandy for at bout 30 minutes
Melt butter in microwave, or on the stove
Use a spoon and slowly swirl and coat all the bread slices with butter
Trim off the sides if the bread (not necessary white clean, a little crusts would give a crunch)
Then cut it into about 8 triangles each slice, I did not care bout getting it really uniform, just about the same size
Reserve triangles from two side slices of bread to one side
Then line the bread triangles in two rows, slightly overlapping one another in a glass oven proof dish (I used an oval dish about 12 cm width, 5 cm thick, just use one big enough to accommodate all the bread and some room for puffing up)
Cream together eggs, milk, sugar, vanilla and cinnamon until bubbly
Then pour in the raisins and all the liquid and mix well
Slowly, pour this custard mixture onto the bread slices
Take the reserve bread slices and chuck it in at all the sides, with the crusts facing outwards, lining next to each other
Put the dish into the refrigerator and let it soak for about an hour
Preheat the oven to 180 C
Take the dish out and then sprinkle the jaggery powder all over the bread top
Bake the bread for 45 minutes

Serves 8-10 party people


Sunday, July 02, 2006

Going Thai

It has been so long since I contribute to the weekend herb blogging at Kalyn’s (I got to her blog and found her blogging on the same herb this week, how coincidence!). This time I decide to add in my entry on Chinese parsley (pictured above as garnish). This herb surprisingly has various names referring to it, where last year, without the world of blogging to expose me, I would be totally lost. It is also known as coriander leaves, cilantro and dhania in other parts of the world. It was once pretty confusing when I see it mention in foreign recipes and I had to research up on it. As for its uses, it is usually used for garnish as it will loose its flavours quickly with heat.

But this time, as per recipe I would be cooking it slightly at the end and then garnish it with more parsley. This dish also features a lot on the limau purut (kaffir lime leaves) which I had blog before on of those long-time-ago herb blogging. This time I am making a dish from the Thai cuisine. Thai is one of my favourite Asian cuisines, apart from Chinese and Indian, and also not to mention Vietnam. Thai is famous for its sweet, sour and spicy cuisine, complex in taste yet light on the palate.

So since these are my last few days of freedom, and usually being alone during the day, I decided to whip up a light lunch. Flipping through the recipes, I was drawn towards making my very own

Pad Thai

I remembered having this dish before but I cannot recall where. Nevertheless, I know it would be good, as reading the ingredients made my mouth water. This dish can be chow (fried) with other meats such as chicken or beef but this time I am using prawns, since Tesco is having a huge sale on prawns, and it seem to be more authentic this way. Then of course there must be the fish sauce, which is the main flavouring agent in this dish. You can also substitute it with soy sauce, if you don’t have it. Oh ya, I wanted to get glass noodles for this, but I cannot seem to find it in Tesco, thus I bought brown rice vermicelli instead, just for the sake of nutrition, hence the darker looking Pad Thai. Since this recipe have many variations, and you can add many ingredients or omit them, I would list down the alternatives too and do take note everything is in estimation, after all, this is done with Asian cooking style (if you don’t know what style, it is the dump, fry and taste style). Enjoy.

200g of noodles (rice vermicelli or glass noodle)
12-15 Prawns (I forgot how much I bought, but lets say two big fistfuls)
Bunch of mushrooms (sliced thinly)

1 fistful of Chinese parsley (stems removed)
1 fistful of kaffir lime leaves (roughly teared up)
1 bunch of Chinese chives or scallions (green parts only, cut up 1 inch long)

3-5 Thai bird chillies
5 shallots
5 cloves of garlic
1 20inch cube of fresh ginger
(all above peeled and slice then grind)

Fish sauce to taste
3 tbps of oyster sauce
1 lime (zest and juice)
1 Tbsp tamarind (soak in some water)
Sugar to taste
Some broth or water
Oil

Garnish:
½ cup unsalted peanuts
1 fistful of chopped parsley (stems removed)

Variations (substitute or add in):
1 boneless chicken breast, sliced thinly, marinated with fish sauce for bout half hour
2 blocks of firm tofu, sliced thinly (I should have added this, I love tofu)
1 egg
Pepper to taste
Fistful of bean sprouts
Banana flower

First soak the noodles in warm water until soften, then drain
Grind up the spices – chillies, shallots, garlic and ginger
Remove the parts of the prawns that you do not like, I left on the shell and tail plus half the head, legs removed of course.
Then heat up the wok in about 3 tablespoons of oil.
Throw in you paste and fry briskly, till the aroma is all over your kitchen.
Then add in the prawns and fry quickly till slightly red
Add in mushrooms, give a quick fry as it wilt quickly
Add fish sauce to taste
Now add in the drained noodles, fry until slightly limp (careful that it does not stick to your wok but still the heat must be high, else it will turn watery)
If using egg, push aside the noodle and crack in an egg, scramble till cook and then fold into the noodles
Then add in fish sauce, sugar and pepper to taste and tamarind plus its water
Then fry some more till a little dry, then lower the heat a little
Add in oyster sauce and stir till combine
Add in the scallions or chives, lime leaves and parsley, stir fry a little more
Off the fire, dish up and serve, garnish with chopped peanuts and more parsley and a lime wedge if needed.

Serves 3-4 people for lunch

Friday, June 09, 2006

Exploring My Origin: Bak Chang

I am back in my hometown for the weekdays and I had gotten myself busy with, yes you guess it, cooking! Well, I know I’m pretty late but since I only got back last two days, I pestered my Lai Ma (nanny) into making bak chang with me.

Bak chang is actually Chinese meat dumpling that is usually made during the Duan Wu festival. As all Chinese festivals, this one too has a legend behind it. This day is to honor Qu Yuan, a wise minister in China who was greatly loved by common people. Due to despair of the government and the defeat of his country, he drowned himself in a river. After that people searched for him in the river with long boats, beating drums as they went and throwing dumplings into the river to feed the fishes so that they won’t eat his body. After that, on this day, fifth day of the fifth month in the lunar calendar, it is then customary to enjoy bak chang (commonly known as zongzi) in memorial. Dumplings are made and enjoyed while dragon boat races are also held alongside, in commemoration of the initial search.

Since young, I had always enjoyed these dumplings, thought it is only quite recently that I learned of the meaning behind it. There are many types of chang (dumpling) made here in Malaysia. The usual ones that I know of is bak chang (which I made this time), which is savoury, and the kan sui chong, which is the sweet type, made plain with lye water and to dip with kaya or coconut caramel. These two are my usual favourites. Bak chang comes in two types, the dark or the white ones. Foodcrazee had talked bout the white ones here. The usual ones that I always had were the dark ones, which is the one I made this time. Bak chang usually have sam chang bak (pork belly), Chinese mushrooms, dried shrimps, either pak mei tau or lok tau (split green peas), salty duck egg yolk and of course, my personal favourite, fong lut (chesnuts).

The process was tedious, as I had expected. But I was adamant to learn and make it; else the tradition and method will be lost. After all, making this dumpling seems like a very good addition to my ‘exploring my origin’ project.

When I got back, I was only half expecting my Lai Ma to make bak chang with me, I had requested since last week, as she is the type who needs to be in the mood to do something. Nowadays, it is up to whether she feels like it or not, or she is tired or not. This time I got lucky, she asked me bout it and then took everything out to prepare. She said she made some before hand and there are leftovers ingredients. The only thing that I needed to do was to walk 5 minutes to the local tim chai (mini store) nearby and get some beans and extra bamboo leaves for wrapping.

So far there are many variations in making this bak chang, but to me my Lai Ma’s bak changbak chang was out and ready to be devour! All I can say is, my cravings had been answered.


Bak Chang

Alright, the whole process is pretty tedious and seemingly complicated, but don’t feel daunted, take up the challenge and make it. As for me, my chang is much simpler, with less ingredient but nevertheless yummy. I also left out the usual salted duck egg yolks, because the selfish me do not like it.

For the recipe, I break down to few parts for easier preparation. Most of the ingredients, especially the spices and flavourings are all in estimation as, I have said, we Chinese cooked by whim, with fingers dipping in and tasting as we go. It is always a splash of this and a dash of that and some jiggling of this and some spoonfuls of that. My Lai Ma said, cooking by taste is one of Chinese secrets to good cooking, as all ingredients we use differ, our own tastes of what is salty and sweet also differ, therefore we cooks know best to tweak to our the situation and our liking.

As for the wrapping, I wish I could be a better artist to illustrate it, but oh well if you still do not understand, you can head on to Teckie to see the video of her mum wrapping the bak chang, she had also written a comprehensive detail of the preparation. Be careful bout the wrapping as either if wrongly wrapped or too loosely tied, it will leak and come unwrap, resulting in a mess that cannot be salvage. We lost one of it (must be the one I wrapped, he-he.

Ingredients:
1 kg glutinous rice
800g – 1 kg pork
200g of pak mei tau (not too sure but I guess it is soy bean)
200g (35-40) fong lut (chestnuts) (depending how many you want to put in your dumpling, we have two for each)
8-10 Chinese dried mushrooms (or 16-20 small ones)
Handful of har mai (dried shrimps)
Handful of minced garlic

Additional fillings (I did not add):
Salted duck egg yolk
Hou see (dried oyster)
Lap cheong (dried Chinese sausage)

20 bamboo leaves
8-10 ham choong chou (literally the dumpling weed plant. You can use any string here)

Marinate for pork (in estimation):
2-3 tbsp of five spice powder
Pinch of ajinomoto (I wouldn’t want this but my Lai Ma insists)
Pinches of salt
2-3 tbsp of white pepper
3-4 tbsp of oyster sauce
2-3 tbsp of dark sauce

For the frying the rice (in estimation):
3-4 tbsp of dark sauce
4-5 tbsp of soy sauce (or to taste)
6-8 tbsp of five spice powder
3-4 tbsp of pepper
5-6 tbsp of oyster sauce
Pinches of ajinomoto
Pinches of salt

For frying the fillings (in estimation):
2-3 tbsp of five spice powder
2-3 tbsp of oyster sauce
2 tbsp of pepper
3-4 tbsp of soy sauce

Method:
Day before (or in the morning):
Soak rice with water for at least 6 hrs and up to one day.
Cube the pork and marinate for 8 hrs or overnight

Few hours before cooking and wrapping:
Soak bamboo leaves in water till soft. Then gently wash with running water, wiping with cloth. Stack it up face down in a basin, and then submerge in water until use.
Boil the chestnuts and beans till half cooked.
Soak the dried mushrooms in hot water till soften, then remove stem and halved it (for big ones)
Clean the har mai a few times, running through with water
Drain the soaked glutinous rice.

Cooking the rice:
Heat up 3-4 tbsp of oil in a wok.
Throw in garlic and fried for a minute.
Then add in the glutinous rice and stir fried.
Slowly add in all the frying ingredients, tasting as you go.
Lastly, add in the soy bean, then fry and mix evenly.
Add spices if needed.

Cooking the fillings:
Heat 3 tbsp of oil in wok.
Then add in garlic and stir fry for a minute.
Add in har mai, fong lut and mushrooms.
Fried for few minutes and mix well.
As usual, add in all the fillings spices one by one and fry till evenly mix.
Add in the marinated pork and continue stir fry.
Add in water (bout quarter bowl).
Fry till dry.

For wrapping:
Gather 5 strings together and fold it half, then tie a not to form a bundle
Then prepare a place to wrap, something like this:

Place together ingredients and leaves below it, along with spoon.

Take two leaves and overlap on each other in opposite sides, slightly slanted.
Twist in the middle and turn to shape a cone.
First line the bottom and sides with the rice and bean mix.
Then add in the fillings in the middle: ½ pork, 2 fong lut, 3 har mai and 1 mushroom
Then top loosely with rice.
Turn it upward to close up. Pull it down slightly.
Then turn in and fold the sides.
Fold the top leaves together, then turn down the side.
Now its in a triangle shape.
Tie it with ham choong chou, around the dumpling two times then knot it firmly.

Final cooking:
Put in all the tied dumplings into a huge pot of boiling water, submerged totally in the water.
Boil it for 4-5 hrs, topping up with boiling water every hour or so.
Then take out and hang it to dry.
Peel open leaves and devour!

Make 16-20 big dumplings
(It can keep for few days or few weeks in the refrigerator)

Friday, June 02, 2006

Self-employed in the Kitchen

J had started work today, leaving me this unemployed (starting work in July) girl alone. So I decided to be self-employed in the kitchen instead. Before this, besides hunting for job, we had been enjoying life; hence you see my lack of cooking/baking and more of scouring for food. Now it is time for me to fire back up my culinary skills.

My internet was down because we did not pay the phone bill. Yea, shame on me, but it just somehow slipped my mind. So I had no chance to surf around for recipes. That’s a habit of mine; looking through foodblogs in search of some inspiring recipes despite all these while I had been piling up on it.

So today with no internet, I finally look through my to-do list. It amazes me how much recipes I had saved up, with the sincere heart and hunger to make them. I was attracted by many recipes (well it is love at second sight since I had first saved them here), but the thing is, I do not have lots of essential ingredients in my pantry right now. For instance, milk or yoghurt or buttermilk or brown sugar is out. That practically cancels out most of the dessert recipes. I’m feeling sugar high right now, so I am just looking through this section. I chance upon this recip, from the baker which I had saved in my to-do list for as long as I couldn’t remember. LOL.

Well, this recipe took my attention the second time because it is flourless and butter-less! Now this is what I call a dessert for the weight watchers. Oh yes, and it’s a cookie recipe, which the baker decides would fare much better as cupcakes. So I decided to make these mini cupcakes. boy, was it good! It was like the heaven for chocolate lovers. It is crunchy at the top and thick and gooey in the middle. The nuts lend a good crunch to the entire cake texture. Now you chocolate lovers out there, who need a fix but want to watch the waistline, go make a batch yourselves. Due to the resulting look of the cakes, I decide to name it


Mini Molten Chocolate Lava Cakes

The recipe is fairly easy. Reading the instructions I was worried at first how it would come together with just two egg whites as the liquid ingredient, but surprisingly it binds well, not too sticky to handle and the ‘dough’ taste yummy! (Yes I am a bad habit cook that loves to taste things that she cooks). Some additional steps that I added was, first toasting the walnuts for better taste and then sifting the sugar and cocoa for lighter and more uniform batter. Before baking it in my muffin pan, I cut out the baking paper to roughly line the holes because with all the sugar in the dough, it is bound to stick like madness, and I am thankful I did this step, as it helps tremendously in taking out the mini cakes with the shape still intact. I think if you have cupcake cases, it is a good time to use them here. Besides, I had split the recipe in half, because I have so little to feed and I am worried I might finish off the whole batch! Oh and I feel that the sugar amount can be further reduce by ¼ and it would be perfect, more chocolatey and less sweet, the way I would really like it.

6 tbps unsweetened Dutch-process cocoa powder
1 1/4 cups confectioners’ sugar
pinch of salt

1/2 tbps vanilla
2 large egg whites

1 cups walnuts (toasted at 200 for 5 minutes then coarsely chopped)

Preheat oven to 350F/180C
Sift together cocoa powder, confectioners sugar, and salt in a bowl
Combine the liquids, vanilla and egg whites in a bowl
Slowly add the liquids into the dry mixture, beating at low speed with an electric mixer
Then beat the batter at medium speed till glossy
Stir in the walnuts
Line the muffin pan with baking papers/cups
Spoon about two heaped tablespoon of batter into the cup
Bake in oven for 20 minutes, till it looks like molten lava

Makes 6 mini cakes

Saturday, May 27, 2006

Happy Birthday KC!

KC is someone I might say I get to know due to fate. When I first came to KL to study, I came with a 1984, and then we bunked in a Convent senior from basketball team, temporary until we find a place to settle on. Then, KC was my senior’s boyfriend, therefore we get to know each other. From there, after shifting, we sort of keep in contact loosely until I shift over here to our place now, he so happen to have broke up, needed a place to shift and voila, he became our housemate once again.

As a friend, KC is amazing. He will do anything at all for his friends, always there whenever any of us needed help. He took care of me and my fellow 1984 housemate like sisters, protective and loving. We three in the house had once even named ourselves family.

Well, last monday was our dear KC birthday, I had decided to bake him a cake, although I know he does not really like one, but well, what’s a birthday without a cake. So, as I had put it at the weekly drools for so long, I decided to make Swee San’s

Carrot Cake with Cream Cheese Frosting

I made a few changes due to the unavailability of some stuff, and also due to a hunch to make things come together after certain changes. Ah, you bakers out there would understand.

At first look of the recipe, I had decided that the amount of sugar is too much, so I cut down quite an amount, and besides, we could not get white sugar in Tesco, imagine that, so we bought more of the brown sugar. I warn that even my amount of sugar is too sweet to my liking. Cut down more if you don’t want to have diabetes. Since having more brown sugar than white (in oppose to original recipe), I worry it would be too wet, thus I mixed all-purpose flour to the cake flour, in hope to make it drier, tell me if I’m wrong. Then, as Swee say, the corn flour addition is to make the cake fluffier and softer; I’m getting texture crazy here. I had also change the cream cheese frosting bit, since I don’t have enough butter, I added more cheese, partly also because I love cheese, so I want it to be more cheesy.

Anyhow, a few flops happened. First after baking at designated time and the toothpick came out clean in the middle. I took it out. Once cool, I remove from pan and found the sides all sticky and gooey and superbly sweet. All the sugar somehow formed a candy there. So I cut the sides all off and made a mess, with craters here and there. One lesson learnt: ONLY cut the cake once it is completely cooled! Then another mistake came with my impatience. Once the cake is semi-cooled, I attempted to frost the cake, partly because I’m impatient and partly it is late and I just want to get it done with. That is when disaster strikes. The frosting started melting as I starting spreading it. It became too hard to handle, steaming down the side. Second lesson learnt, ha-ha. I stopped at once, salvage what I can back to the rest of the frosting and chuck it into the fridge. After chilling few hours (yes I have yet to sleep), I frosted it with more luck, but sadly found the frosting with residue of icing sugar. Sigh; there goes my first cake frosting.

Ingredients
1 cup vegetable oil
500g brown sugar
200g coarse sugar
3 eggs

3 cups sliced carrots (2 large or 6 medium)
1 ½ cup coarsely chopped/bashed walnuts (roasted in 200C for 10minutes)

Sift:
1 cup all-purpose flour
1 1/2 cups (375g) cake flour minus 1tbsp
1tbsp corn flour
2 tsp baking powder
1/2 teaspoon bicarbonate of soda
1 teaspoons mixed spice

Method:
Preheat oven to 180-190C
Grease deep 23cm (9 inch) round loose-based cake pan (line base with baking paper if you do not have loose-base one)
Beat oil, sugar and eggs until thick and creamy
Transfer mixture to large bowl
Stir in carrot and chopped walnuts
Then mix in sifted dry ingredients little by little till incorporate
Pour mixture into prepared pan, bake in moderate oven about 1 1/4 hours
Cover cake loosely with foil halfway through cooking
Stand cake 5 minutes; turn onto wire rack to cool.
Spread with cream cheese frosting and decorate as desired.

Cream cheese frosting:
25 g butter
120g cream cheese, softened
250g icing sugar mixture

Method:
Beat butter and cream cheese until light and fluffy
Gradually beat in icing sugar bit by bit

Friday, May 05, 2006

Satisfying a Craving

I wanted to post this up for the Jihva by Mahanandi, but I was off to Taiping, having fun and forgotten about it. But since this is a really cooling and refreshing dessert, that I sort of made up, with inspiration from sai mai lou that we have here in Malaysia, I decided to share it anyway.

Sai mai lou is actually sort of like ais kacang in Malaysia. Ais kacang is actually shaved ice swirled with sweet syrup (sometimes Gula Melaka) and evaporated milk then topped with various stuff, like mini jellies, red beans, peanuts, sweet corn and lots more. As for sai mai lou, the similarity is that it also has shaved ice, swirled with evaporated milk and fruit juice then topped with the cubed fruits and sago pearls. Of all the varieties, I always like the Mango sai mai lou best, as it is rich in taste and goes really well with the light milky ice and sago. The best one I ever had, which was the first, that got me hooked to sai mai lou is the one at Petaling Street (Malaysia's Chinatown). I’m not sure of the location but I remember is at one end of the street opposite a bank, and with a bookstore nearby. This roadside stall is manned by a lady, which has all sorts of sai mai lou, from honeydew, strawberries to of course, Mango.

As for my own version, I was craving for something alike, but of course I have to do away with the shaved ice, which needs a machine-like-device to shave a huge block of ice, and poor me as my blender could not take ice (yea a cheap one), and so came about this dessert that I call

Mango Sago Lou

1 mango:
1 cup cubed mangoes
1 cup chopped mangoes

1 cup milk
¼ cup sago pearls

Method:
Boil the sago pearls to translucent (a tip is to only put in the sago pearls when the water is boiling hot, in order to get clear looking sago in the end, stir once a while as the sago will stick to the bottom)
Once done, pour the sago into a colander and quickly run through with cold water to stop the cooking.
Scoop the sago into a bowl
Blend the chopped mango and milk together
Pour onto the sago, and then top with cubed mangoes
Chill for about an hour or a while in the freezer (like the lazy me) then devour cold

Satisfies 1

Note: I forgot to mention that my mangoes was really sweet and if yours are not so, do add some syrup (sugar water) to taste. Bon apetit!

Thursday, April 13, 2006

A Cheesy Reward

Yesterday was the day I’m supposed to stay at home and hit the books. My final exam is just around the corner, and I have yet to start on my revision. It took me whole day to really start firing up. Once a while I would sneak into the net and surf the food-blogosphere, to torture myself with all the yummy food out there. I stumbled upon a recipe at Jennifer’s blog, Fallen Souffle, which immediately made me think of J. Yes, you got it right, to think of J, it has to be of cheese and something cake-like. His secret vice. It was Jennifer’s quick and easy Mini Cream Cheese Tarts that had caught my attention.

J and I were both “studying” at our own home, and only to meet at night. Besides the though of rewarding him for his hard work, I also remembered promising him a cake since it had been a long time he had indulged. We nearly went to a local cake shop few weeks ago, but it was too late and the shop is closed for the night. Thus I promised to make for him next time. So here is how I came up with my slightly tweaked version, which I called the

Cream Cheese Bites

I changed the recipe a bit to suit my taste and my pantry of course. First, I used considerably lesser sugar because I do not want it too be too sweet, it might drown the cheesiness out. Then, since I do not have any wafers, I decided to use the idea of regular cheese cake base, by crushing up oats crackers (this was what I have in stock, you can use anything else, like maybe the usual digestive biscuits), and then press it together as base. Lastly, I do not have any tangy jam to put on top of my cheese bites so I forego it, though I really think it would had been a really nice addition. After baking, the cheese bites puffed up, with one cracked up, and then when taken out, it fell a little. Be careful when removing it as it is really soft right out of the oven, which I had disfigured some of it.

225g softened cream cheese
½ cup sugar (or less)
1 egg
1tsp vanilla essence

6 oat crackers/biscuits

Preheat oven to 180C.
Coarsely grind oat biscuits till grainy, then press it into the muffin holes. (I used the back of a glass to compact it)
Then, cream together the cheese and sugar.
Add egg and vanilla essence, mix till incorporated.
Spoon onto the prepared oat base in the muffin tin.
Bake for approximately 20 minutes until set.
Allow it to cool down and refrigerated for better taste.
Then munch on!

Monday, March 27, 2006

IMBB 24: I Can Make it in 30 Minutes!

When I heard of the theme for IMBB #24, cooking in 30 minutes, and to top it off it has to be a full meal, it got me excited. To me a full meal means it has to be of various nutrients, enough to satiate hunger and to sustain through the day or night. To a Chinese, the fastest and easiest all in one meal could only mean one dish, yes, fried rice.

We Chinese fried rice like it is nobody’s business. There is no standard rule, no recipe to follow and every cook fried their rice their own personal way. Our fried rice does not mean just frying the rice, we add in whatever fresh ingredients we have in the pantry. We throw in this and that, whenever we see fits. In other words, fried rice is basically a dump and fried dish, albeit the prior washing and chopping.

In my opinion, fried rice must be originated from those genius housewives that have plenty of leftover rice everyday and came up with ways to make use of it. Cooked rice from last night dinner could be a quick nutritious whip up lunch for today. Whatever fresh leftovers, could be the extra handful of long beans or the two sticks of carrots or the last chicken fillet, can then be used up to make this magical fried rice. Using the leftover rice was actually the key, as I have been told, since the rice is drier and more tough, thus after frying, it will be at the right texture.

In most Chinese fried rice, the basic secret is in the sauce. Yes, the sauce added when we fried the rice. As far as I usually see, there are two distinct types of fried rice, the white ones or the brown ones. For the white fried rice, it could mostly mean the absence of the dark soya sauce, which is usually used for browning in Chinese cooking. It does have taste too; therefore white fried rice and brown fried rice taste somewhat different, but be careful with the dark soya sauce, as too much added, your dish would be bitter. Usually the white fried rice is added flavour with pepper while brown fried rice is usually heavily laden with soya sauce.

As for me, I have never ever fried rice two times the same way. The basic idea is there, but there are always different ingredients, different mixes of sauces thus different tastes. I fried rice numerous times as it’s my trusty quick nutritional whip up of a full meal. Since there are no ‘proper’ recipes for fried rice, in my context, I would just suggest what is there to add into your fried rice, your take.

It is real quick, especially with leftover rice, it could even be in 15 minutes, along with all the preparation, but if not, I’m sure you can cook the rice first, which takes only about 13 minutes. Be careful to add less water/no water as freshly cooked rice are slightly on the wet side, and you do not want a soggy fried rice. Ultimate fried rice has to be fluffy and every grain is separated. So overall, you will have a complete meal in less than 30 minutes!

Chinese fried rice (must haves)

Basic ingredients


Shallots – my grandma taught me this, as it imparts the important aroma in the every fried rice. Always fried the shallots first, till slightly brown, then add the rest of the ingredients.

Onions – in addition or in absence of the shallots, this could be a good substitute. Brown the onions well too.

Garlic – and lots of it I might say, it is one of the essential basic ingredient in every Chinese cooking, I personally like it finely chopped for fried rice

Eggs – it is this is an essential to seal in all the flavours of the fried rice. The secret is to throw it in at the end, mix thoroughly with the fried rice and the flavour is sealed in with extra kick! I learnt this from Ah Ma too, as not all Chinese cook does it, but I believe most of it does.


Meat (making the fried rice tastier)

Meat gives fried rice its sweetness and the full flavour of it. Though not necessary, but with it, your fried rice would be more kingly tasty and of course, the needed protein. Usually one kind of meat is use, in order to maintain its simplicity and not to complicate the flavours too much.

Chicken – boneless chicken are usually sliced and dice into small bite sizes to be used in fried rice. This is the most common meat next to pork.

Pork – a Chinese favourite red meat, really sweet and juicy and totally gives the fried rice a distinct taste. Usually chopped up, or sliced and even roughly minced for some.

Beef – though seldom used but I had ate some in restaurants, something different but nice too.

Prawn – this is actually the secret to a real fried rice fragrance and tastiness. In oppose to what I said, prawn can be added along with any other meat, it is after all seafood, but it serve the same purpose, and definitely do it much better.


Vegetables (personal should haves)

Veggies are good additions to fried rice to add in the nutrition and also making it more complex in tastes, textures and presentation.


Long beans – these veggies pack a good crunch to the fried rice, thus bringing the texture to the whole new layer. It is good for ya and just right with the fried rice.

Carrots – carrots also pack a good crunch to the fried rice. Have it sliced thinly or finely chopped. Not to mention it add good colours to the fried rice. Who doesn’t love orange?

Spring Onions – though I do not always add this in, as I seldom buy it, they come in huge bunch and I just seldom get to finish it. It is usually used for garnishes in dishes, in this case it is a good addition to fried rice, especially good with the brown ones.

Herbs – yes you could add in any herbs you think is right, like fresh Chinese parsley, or basil or even mint. I recently ate J’s mum brown fried rice with mint; it was tasty and refreshing with every bite on the mint.


Sauce (the usual)

Soya sauce – main base for the saltiness in the fired rice. We seldom use salt in this.

Dark soya sauce – to make brown fried rice

Oyster sauce – for the extra kick

Fish sauce – just for taste

Sesame oil – just add a little at the end

Chilli – sauce or sambal or paste, if you want a spicy fried rice

Thursday, March 23, 2006

CCC Craze

It is always good to be able to dig up my old archive to share with you guys. During the time I started this lovely blog of mine, I was in my term holidays. That was went I did lots of baking and cooking, and sharing it here. Now that time does not allow me to do so, I have continued religiously drooled over many food blogs out there.

So, about digging into my archives, I usually cook, take picture and then store it in a folder in my computer along with the recipe. So far, I just notice this folder getting much larger than other picture folders I have.

There was this local food forum that I joined, named Jo’s Deli Bakery. Then there was once we made a meet up along with fellow Malaysians from the forum Kitchen Capers, that I always talked about. At the party, obviously a food party, everyone is to make something to bring there. Like how we local like to call it potluck. Then a lovely forum member made a wonderful chocolate cheese cake, which got everyone hooked and craving for one. So naturally, we demanded for the recipe and then forth started the phase, we called it, the CCC craze.

If you keep drooling over various chocolate cheesecakes from the same recipe, and keep on hearing people rave about it day in day out in the forum, there is only one natural course of action. Yes, you make one too, not just to answer the craving since the gathering day but also to see what is all the fuss about.

And I have to say, it is all worth the fuss! It is fairly easy to do, and simply delicious. It is hard for me to describe how good, you go try it and you tell me! This might even start a CCC craze in the blogosphere, who knows, as it is really tempting and the result is going to be an expanded waistline with a wide smile.

Alright let us now see what the fuss is all about but be forewarned, it might start you into a phase.


Chocolate Cheese Cake

Making the mixtures was really easy, but layering them was the problem. When I poured in the final chocolate mixture onto the cheese layer, I made mistake by pouring too much in the middle, then end up scrapping it all to the side, which in the end causing the side rim to have too much. Nevertheless, the effect was not bad; I got wave-like layers, which some people thought I did it on purpose.

I also found that I had to take longer baking time than suggested, then later I found out its because I used an 8-inch pan instead of 9. But I will still stick to 8-inch, because the height of the cake is just nice with the layers clearly shown, and of course, it means bigger portion in every slice. You won’t regret it.

Mixture A:
250g cream cheese
60g castor sugar
1 egg

Beat cream cheese with sugar until light and fluffy
Beat in egg until well incorporated
Set mixture aside

Mixture B:
180g butter
150g sugar
3 eggs
3 tbsp cocoa
120g flour
1 tsp baking powder
Pinch of salt


Beat butter and sugar together until light and fluffy
Beat in egg, one at a time until well incorporated into mixture
Sieve all the dried ingredients together
Fold it into the egg mixture

To assemble:
With an 8-inch cake pan, pour in half of mixture ‘B’, then all of mixture ‘A’, then remaining mixture ‘B’
Bake in preheat oven at 180C for 55-60 minutes (45-50 minutes for 9-inch pan) or until skewer comes out clean
Serve well chilled


Wednesday, March 15, 2006

Now and Before

Now:
Not much cooking nowadays but all workload is starting to lessen. My final year project is soon to be over and then I can concentrate on my finals. Then it is off to the work force for me. Seem really daunting yet exciting. All said I am ready to take on the challenge and start a new journey in my life. We all have to learn to adapt to changes and make the best of it. I am glad I have learned to do so. What bout you?

Before:
Anyway, I just remembered this recipe I attempted ages ago (few months) that I have yet to share with you guys. It is from an issue of Flavours, a local food magazine which I am an avid fan of. I came across a simple yet intriguing recipe called Pongteh. This dish is from Peranakan origin, which we called Baba and Nonya. I had wrote bout them before. A glance at the recipe and it got me thinking of it day and night, so I had to put it to an end. I made it.

Pongteh (Chicken Stew with Preserved Soy Bean Paste)

This recipe uses ingredients readily available in most households. Chinese households if not. I’m not sure whether many would have the preserved bean paste, which is actually a thick, salty fermented soybean paste. I believe one can get in any asian market easily. Here, it is a must in this dish as it holds the base flavour of it. Gula melaka is actually unprocessed raw palm sugar, easily available in Malaysia. As the name stated, it is originated from Melaka, home of the Peranakans.

As usual, I had left out ingredients to suit my taste (or my pantry) and tweaked the recipe a wee little bit. In the original recipe, one can add belly pork and also shitake mushrooms and yam bean. In the recipe, it calls for first boiling the sauce with the mushroom for 20 minutes. Once again, I took the shortcut, and since I did not use Chinese mushrooms anyway, I only bring it to boil, cut down added water and cooked to a much shorter time.

The recipe noted that it will taste better the next day after the flavors had a chance to infuse into the meat. I for one am not going to compromise this. The overnight dish was great with the meat deeply infused in the taste, which comprises mainly of the bean paste. To me the taste is unique and it is an overall fairly easy recipe. Do try it!

5 chicken drumsticks
3 tbsp cooking oil

Grind to paste:
4 red onions
5 shallots
6 cloves of garlic

2 tbsp preserved bean paste (tau cheo)
600ml water
5 potatoes (cubed)

40g gula Melaka (palm sugar), or to taste
1 tsp of salt

Heat oil and sauté the onion, shallot and garlic paste till fragrant, stirring continuously.
Then add in the bean paste and fry till oil separates. (This did not really happen to mind as I had lowered the oil content considerably)
Add water and bring to boil.
Lower in the chicken and simmer for bout 15 minutes.
Add in the cubed potatoes.
Continue to cook for another 30 minutes or till chicken is tender and potatoes are soft.
Add water if gravy becomes too thick.
Season to taste with sugar and salt

Added: A fellow reader asked me about what tau cheo to make sure she got the right ingredient, so here it is:


Saturday, January 28, 2006

Sugar not so High Friday #15


Finally I am back in my hometown. These day it was really hectic for me but I just could not pass out the opportunity to join this month’s SHF #15 hosted by Sam in Becks & Posh. So as usual I go for the easiest recipe I can find but of course still very tasty.

Since we are looking for dessert low in sugar and best to feature natural sugar, all I can think of was the Gula Melaka in my pantry. It is an all natural sweet sugar made from the sap of the coconut palm. As the name implies, it is widely known in Melaka and a favourite use among the Peranakans in both meals and desserts. Here in Malaysia, it comes in form of rolled blocks. These sweet rolls have distinct flavour themselves, not light brown sugar or honey or even golden syrup or dark molassess. You got to taste it to know it but as you know, it will always be a star in every sweet recipe if added. Yes it is that distinct.

Gula melaka is usually the star in many of our local Nonya kuih (our local cakes) alongside with the famous pandan leaves that I have kept talking about. It is used to make many other sweet desserts like cendol (I would talk about this nest time). I had even used it to make my macaroons! Really versatile and pair really well with pandan and coconut.

Here I made a really simple recipe using sago pearl. Sago is actually starch from the sago plant which can be made into pudding and is also usually added to many of our local ‘tong sui’like my Hak Lor Mai. This time I made sago pudding drizzle over with little bit of evaporated milk and then drown in gula melaka syrup. Heaven!

Sago Gula Melaka

The recipe here is in terms of guessing and estimating as it is to modify to suit ones taste, whether you want it really sweet, or less or more milk or vice versa. Besides, the amount yield would also differ according to your pudding cups. I made mine in little bowls since I have none. Ah, displaying my lack of kitchen tools again.

100g sago pearls
50 gula melaka
½ cup of evaporated milk

Bring water to boil in a pot
Add sago pearls to boil for 10-15 minutes or all the pearls are translucent (best to keep stirring as I have some stuck at the bottom once left unattended)
Remove from heat, pour onto a sieve and wash with running water.
Drain excess water and put aside.
Press the sago pearls into pudding cups, packing it tight together.
Refrigerate it for 1-2 hours then serve cold.

Melt gula melaka in a pot or microwave with about ¼ to ½ cup of water to it. (This amount depends how diluted you want your syrup to be. Chill.

When serving, unmould the sago pudding onto bowl, drizzle over with evaporated milk then drown it with the sweet exotic gula melaka and enjoy an all natural sweetness goodness.

Yields bout 6 small puddings or 3 large ones


Tagged with: +

Wednesday, January 25, 2006

Coconut Macaroons

Where have I been? Life has been good I assure you. But it does not mean life had been easy. I am up to my neck with assignments and my final year project. With Chinese New Year coming, this coming Sunday to be precise, we at the university had been trying to cram everything into this week, in order to make way for a week long holiday. I will be homeward bound this Thursday, and I promise many pictures of my beloved Taiping and of course, our huge celebration marking a New Year in the Chinese Calendar.

My friend would also be celebrating her birthday next week, and I promised her a cake. I asked her for the flavours she liked, and she came up with a challenging theme, “Colourful”. How creative! It got me excited, yet I have not even thought of what to make.

Rabbit from Pearl of the Orient is hosting this month’s Hay Hay is Donna Day event, which she had won the last time with her really beautiful swirled self frosting cupcakes. I had joined that too at last minute with my Pandan Kaya Frosted Cupcakes. Now I could not pass up this opportunity.

The base recipe is simple and with lots of place to tweak and improvise. Here’s two version of mine. I tried to make it cute for Rabbit, and readers who would be voting, but could not think of any other way than to spontaneously add the little piggie pouncing at the macaroons. Let’s fight for it else it will be gone!

Lemon Macaroons

This I basically just substituted Rabbit’s lime zest with lemon. These are the bunch on the left side in the picture.

2 cups desiccated coconut
½ cup sugar
2 egg whites
1 ½ tbsp lemon zest

Preheat oven to 180C
Mix coconut, sugar, egg whites and lime zest in bowl to combine.
Use a spoon to scoop it onto hand and squeeze to it to ball size.
Place on a lined baking tray and bake for 10-15 mintues or till light golden.

Makes 12-15 fluffy macaroons

Pandan Gula Melaka Macaroons

This one is an Asian twist to these lovely macaroons. It came on an impulse as I thought of my pandan leaves in the refrigerator. It was in a way inspired by an Asian coconut candy that features basically the same ingredients but cooked till thick and then chilled. This one is really good!

2 cups desiccated coconut
½ cup Gula Melaka (raw palm sugar) or brown sugar
2 egg whites
2-3 tbsp shredded pandan leaves

Preheat oven to 180C
Mix coconut, sugar, egg whites and shredded pandan leaves in bowl to combine.
Use a spoon to scoop it onto hand and squeeze to it to ball size.
Place on a lined baking tray and bake for 10-15 minutes or till light golden.

Makes 12-15 fluffy macaroons

* Malaysia * Good Food * Recipes * Travel *Reviews * Asia *