We have moved to thamjiak.com! Please use the search box there to find your current post ->

Tham Jiak
Tham Jiak means in some way "love to eat" in Hokkien. I am a Malaysian Hokkien and truly love to eat.

Sunday, December 04, 2005

My Blog Went Up in Flames!

Oh no! I did not mean to burn my new beloved blog. It’s young, barely growing and I’m killing it! No, it’s just that I’m joining in a one off event, thought up by Rachael at Fresh Approach Cooking, to let the world know how bad a photographer I am. But I guess you already know that judging from my previous pictures. Nevertheless, lets pretend those are not as bad to be in this entry.

The following not-so-kind-to-the-eyes-or-appetite picture will be featuring one of the food that I whipped up in the kitchen on spur of the moment and from inspirations and ideas I mixed and matched from everywhere. This particular one is about the current crave of Hong Kong food mania in Malaysia. You can see how greatly these Hong Kong ‘Char Chan Teng’, which is kinda like bistro ala HK style, had stormed Malaysia. It is really popular in HK and now it had spread over to our side, with adaptation of course. Recently, Babe in KL had just featured them, there are also few more outlets reviewed by Swee San from JustHeavenly and also at Yummy Corner.

As for me, I had only managed to try out and frequented two of the popular ones in Petaling Jaya area which is Kim Gary (both outlets in Midvalley, yeah I know that’s in KL but it is real close to PJ and I considered it in ‘my area’ too and also The Curve, ah, this is definitely superbly near as my condominium is right opposite it) and also Wong Kok Char Chan Teng (both One Utama and the outlet in SS2). If you’re not from Malaysia, PJ is an urban outskirt next to the famous KL town, where it’s younger in development. You can get more information on this wonderful town that I stayed in over at Wikitravel. If you do go over and read, I so happened to live in the northern “chunk” Damansara, as mentioned in there. Anyway, these restaurants are famous for the milk tea and also my all time favourite “Yin Yong” which is actually coffee and tea with milk, plus of course, the cheese baked rice. It is basically rice, with either chicken chop or fish fillet, topped with either tomato or sweet cream corn sauce and baked with cheese sprinkled on the top. Therefore, it is a basically a really simple dish to whip up with whatever you have in the refrigerator.

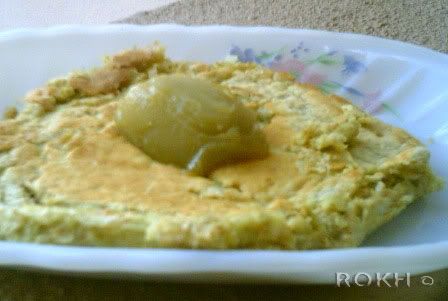
Alright, I have slide way out of topic. As I mentioned, this is a burning-my-blog event to disgust my reader. As after I came up with my concoction, which was on the spur to feed a hungry guy who just woke up from a deep sleep, I promptly serve him on the newspaper he was reading (if you look closely it is in the background) and had a quick snap with my poor quality digital camera plus bad lighting from my dining area, you get the idea how this is going to turn out. Well, I did not fuss to take a better picture when I saw my dear boy with a spoon on one hand and a fork on the other, looking wild eyed at the food with saliva dripping from his mouth (alright I might be exaggerating a little, ok, maybe a lot), and so I chuck the PDA away and let him dig into the food.

Well, so here goes to the ugliest food picture I have ever taken but yet given thumbs-up by a hungry guy (well, when you’re hungry, your thumb is bound to come up eh), but trust me, I tasted it and it can well fight those out there, except maybe a tad too sweet. (I’m such a food critic, *roll eyes).


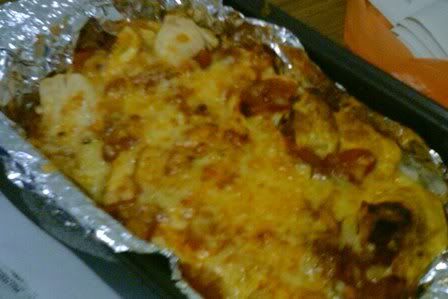
My Version of Cheese Baked Rice with Chicken Fillet and Omelette in Tomato Pineapple Sauce

Phew, what a name. Anyway, here goes a really rough ‘guesstimation’ of my concoction as I just cooked it on a whim. Try it out at your own risk. But I believe you cannot go wrong with these as it is perfectly adaptable in anyway.

A palm size chicken fillet (chopped into pieces)
2 eggs (beaten)

Dash of soy sauce
Dash of fish sauce
Dash of Chinese Rice Wine

1 medium onion (chopped)
1 tomato (chopped)
Bout 3tbsp of tomato sauce
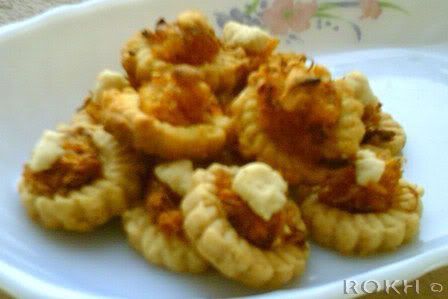
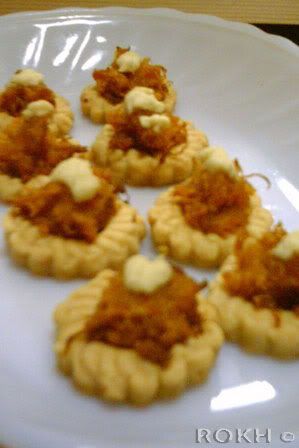
2 tbsp of pineapple juice (leftover from my pineapple tarts)

Olive oil
2 cups of cooked rice
1/4 cup of shredded mature cheddar cheese (or any cheese you prefer)

First, marinate the chicken fillets with soy sauce and fish sauce for about 10 minutes.
Then heat up non-stick pan with some olive oil.
Put in the marinated chicken fillets and pan fried still seared on the outside but still tender inside, it will further cook more when you bake it.
When it is nearly done, give a few good dash of Chinese rice wine for good flavour. Trust me, this is important.
Add another dash of OO, and fried your omelette with another good dash of soy sauce. Remove from pan.
Next, reuse the pan, if it is oily still, you do not need to add oil, if it is dry do so, and put in the onion. Sauté if for sometime till it is soft and a little caramelize.
Then stir in tomatoes and cook for another minute.
Add in tomato sauce and pineapple juice. Adjust to taste.
To assemble, simply scoop rice into whatever pan that is right, I do not have so I had used the bread pan instead (oh such shame), lined with foil.
Then spread half the fried chicken fillets over the rice, top with half the sauce.
Spread out remaining chicken fillets and top with the omelette.
Drown the top with remaining sauce and sprinkled with shredded cheese.
Bake in preheated oven at 250 degrees until the cheese is bubbly, melted and slightly browned here and there.

Serve 1 really hungry guy

Update: Thought my picture had ruined your upcoming meal? Think again and head on to Fresh Aprroach Cooking for more to "unwet" your appetite!

Thursday, December 01, 2005

To Start a Day

I had started embarking on my long due final year project and had little time now to cook or bake and share it here. But I am still trying my best to keep it up. After all, nothing beats home cooked food or the joy of indulging in own creations to cater to my sweet tooth.

Since I am working on my project, I found myself waking up much earlier than my usual routine, but still later than normal people (if you must know, it’s bout near to noon). Once up while I can still call it morning, I had a sudden pang to make my own pancake for brunch yesterday. It had always been something I wanted to try out but have yet to come across one healthy enough or sounds yummy enough for me.

Recently, I came across a recipe somewhere on the net that sounds promising enough and I had modified it to suit my own taste. It is a healthy pancake with whole wheat plus oats and natural yoghurt. It came out simply delicious and at the right note to start the day of battling work.


Whole Wheat Oat Pancake

Initially I wanted to make green tea pancake and had added 1/2 tsp of it, as I worry the taste would be too strong. It turned out that, not only there were no distinct green tea taste, I only managed to tinge my pancake to slightly greenish (you can see it in the picture if you look closely enough). I had omitted a pinch of baking soda by mistake, but to what effect I’m not sure; will try it again next time to see the difference. I have also found this pancake to be fragile while cooking, therefore be gentle when you flip it over, as you can see I have a crack on my pancake, but like what I have said for my chocolate chip cookie, it made it looks the more home made.

The pancake texture was just right, the type that I like which is ‘oaty’ and sturdy, while the taste was not floury (like some bad pancakes I had outside) and with a slight tinge of sourness from the natural yoghurt I had used. After making the pancake, I would love to have maple syrup to go with this, but alas I had no such luxury at hand. I did thought of honey but had forego it and suddenly a bulb light up in my head (seemed to happen every time eh) where I thought of using, yes you’ve guess it, my ol’ and still left at the dark corner of the fridge pandan kaya!

5 tablespoons whole wheat flour
1 tablespoon rolled oats
pinch of salt
1/2 tsp baking powder

1 egg (lightly beaten)
4 tbsp of natural yoghurt
1/2 tsp oil

a dollop of pandan kaya

Heat up the pan with a teaspoon of oil (use tissue paper to wipe it evenly over the surface)
Mix the dry ingredients together
Stir beaten egg and yoghurt briefly
Add wet ingredients to the dry and stir to incorporate
Pour batter onto the pan and use a spoon to spread it out into a round disk of bout 1cm thick
Flip over when it is done on one side and continue cooking
Once done, slide it out onto plate and serve with a dollop of pandan kaya or whatsoever that toots your horn

Serves 1 to kick start the day

Monday, November 28, 2005

Weekend Herb Blogging – Curry Leaves

Image hosted by Photobucket.com


This is my first time participating in the weekend herb blogging, and I could not find a better herb to blog about than curry leaves! This is because it is one of the herbs that I used freshly in variety of cooking, such as my Chicken Korma. These leaves are also readily available in Malaysia.

Curry leaves are featured mainly in Indian cuisines that are ubiquitous in Malaysia as the Indians are one of the three main ethnic groups in my multi-racial country. I have always been a lover of Indian cuisines, and had taken note of this unique and strong smelling herb. This special herb emits a special aroma which I believe, is hard to substitute with any other herbs. If one leaves it out in a recipe, the taste would not be quite right.

Once, our local KFC even had a version of Curry Fried Chicken, where curry leaves are mixed into the batter and then deep fried with the chicken. It was certainly special where the leaves are still clearly shown on the fried chicken, but now it is off the menu as somehow, Malaysians love the long-time hot and spicy version much better.

So in order to introduce this herb further, I had made vadai with it. Vadai is a type of fried gram that we in Malaysia like to snack on. It is extremely tasty with lots of flavours from the spices, a little spicy from the chillies and of course, the curry leaves. In this version that I modified from a cooking forum, KC, it includes masala in it. If masala powder is not available to you, you can make it yourself from a recipe here or any other recipes out there.

Eat it out of your hands with a good lime-chilly sauce and I guaranteed it finger licking good!


Image hosted by Photobucket.com


Masala Vadai

During shaping, I had experience difficulties in holding them together because it was too wet. I supposed it is because I did not drain the soaked dhal grams properly enough, therefore I had added a bit more flour. After that I had chilled it in the fridge while I shaped the rest of the vadais and while I heat up the oil. It did help to hold the form a little.

The first batch of my vadais had gone to the trash because I had flipped it too early before it was thoroughly fried, therefore everything split. I also made a mistake by taking it out too fast, resulting in pieces of under-fried vadais. Therefore, I had timed and found that the best is to first let it fried for at least bout 5 minutes before flipping it over and then fried it for another 3 minutes to achieve the brown outlook with crunchy on the outside but soft on the inside texture. Besides, I found that one should be gentle while lowering the vadai into the oil, using a spoon and your fingers to sandwich the vadai while transferring would help.

1 cup Dhal Gram (grind until fine)
3/4 cup Dhal Gram
2 green chilies (remove seeds, chopped finely)
1 medium onions (chopped finely)
1 tsp cumin powder
1 tsp Masala powder
1 tsp salt
1 tsp sugar
2 tbsp chopped curry leaves
6 tbsp plain flour

Soak both ground and whole dhal gram in separate bowls for 5 hours.
Drain both bowls of dhal gram and mixed into a large mixing bowl.
Add the rest of ingredients.

Mixed together evenly.
Wet your hands and shape them into patties.
Deep fry in hot wok of oil till golden brown (about 5 minutes on one side then turn and fry for about 3 more minutes)

Makes about 10-12 vadais

Saturday, November 26, 2005

IMBB/SHF: Cookie Swap

This month, Alberto’s IMBB and Jennifer’s SHF are having a joint event this month which is the virtual Cookie Swap! This is indeed a rare event for the union and coincidently it is my first time joining in both of these sensational events. Lucky me, as this would be an easier entry for me to handle both events in one!

After reading about this cookie swap, it just struck me to share to the world something traditional and truly Malaysian. I believe no other cookie fit into this description more than the famous Pineapple Tarts (or rather pineapple cookies).


These cookies are a must in most festive seasons in Malaysia especially Chinese New Year, which is a celebration of a new year according to the Chinese calendar. There are many ways shapes these Pineapple Tarts are made, either open tart shape (the one I made), roll up shape, ball shape, pineapple fruit shape or even most recent creative ones with cartoon icons. These cookies are usually served during CNY because in Chinese Hokkien dialect, the word pineapple (Wong Lai) has the same meaning as the ‘coming of prosperity’. Therefore they are considered auspicious cookies.

This had indeed been my all time favourite cookie during CNY celebration, and I can never keep my hands off them. I have heard various comments on how tough it is to make it but also how it these homemade ones can never ever be replace by those commercial ones. Therefore, I roll up my sleeves and brace the challenge for the world to share in this local joy of mine. Enjoy.


Pineapple Tarts

Making these cookies prove to be no easy feat as it needs extra attention and long hours at the kitchen. After making these, I now know why it cost a bomb to purchase it outside. I first made the fillings, where in the original recipe it calls for stirring continuously for 2 hours at the stove! I found it a crazy feat. So I decided to use my non-stick pan and just stir it occasionally while I prepare the dough. Do not worry if the pineapple fillings seem dry at first for it will sweat once you add in the sugar.

I love the kind of melt-in-the-mouth cookies to go with these but had failed to achieve it. This I suspect was due to over baking, where my first batch was slightly over browned in my naughty mini oven (the ever so famous) because I was busy making another batch with the cookie cutter and failed to monitor it. While another huge batch, I tried it with my gas oven (a huge oven of mine which is attached to the stove and uses the gas as heating element) which even after long time of baking, the cookies are still pale looking which ended up drying the pineapple filling instead. Next time, I should just stick to my mini oven and diligently watch over it. I found the baking time and heat a little too much from the recipe, therefore I changed it in the following recipe. I also find that, while cutting out your cookies, chill the remaining dough in the refrigerator for easy handling. Do not roll out the dough too thin else it would not stick to the cutter making it impossible to remove it nicely.


Pineapple filling:
2 med size pineapples, grated & drain off juices, retaining a bit of moisture
2 star anise
1 cinnamon stick
Sugar to taste (bout 100g)

Method:
1. Remove skin and black eyes from pineapple
2. Grate pineapple and squeeze out the juice.
3. Put pineapple into a non stick pan and cook.
4. Stir occasionally for about an hour.
5. Gradually, add sugar and cloves.
6. Cook for another 30 minutes or until it is dry and sticky.

Pastry Ingredients:
283g cookie flour (red rose flour)
28g sugar
184g butter
1 egg
Pinch of salt

Method:
1. Sieve flour, add salt and sugar and mix together
2. Rub butter into flour (use your fingers)
3. Beat egg lightly and add to the flour
4. Knead into a soft and sticky dough and leave it in the fridge for at least 1 hour.
5. Roll pastry to 1/4 inch thickness and cut out with cookie cutter.
6. Fill pineapple filling onto the cookie.
7. Bake in oven at 190 C for 15 to 25 minutes till golden brown.

Makes bout 75 auspicious cookies (if you can resist popping it into your mouth)


Update:
Check out first half of result at Domestic Goddess
Don't miss out the second half over at Il Forno

Sunday, November 20, 2005

Hay Hay Its Donna Day - Localised Version

I read this event at the last minute over at boo’s, which is Hay Hay Its Donna Day, a One Off Meme. I guess I can forego the introduction of Donna Hay, since there are many who had introduced her. This event was inspired by Nic’s post, which I had since ages ago copied it into my to-do list until today. Since the event is alive and kicking all over the world, I might as well join in the fun and take off something from the ever-ongoing list of mine.

Though I do not know much bout Donna Hay but I did flipped through her magazines and books before in MPH. I did that a lot last time during my internship, at lunch break. I used to gather a bunch of food magazines and recipe books, grab a nice lawn chair; yes they have that in Midvalley MPH with a nice “garden-like” surrounding. All I know is that she uses straightforward and simple approach in her recipes, which many including me simple love it.

When I read the ingenious boo making her cupcake swirled with kaya, a local coconut egg jam, I swore a bulb just lighted up in my head. I had two kinds of kaya in my fridge which seems to be there for ages, which no one in this house seems to be interested in. How in the world did it get there in the first place? Well, at the period when everyone got sick in this house, including me, my housemates bought kaya and bread, a seemingly usual fare for the sick in common Malaysia household. I wonder where they get that idea, but nonetheless, my housemate followed the tradition but naturally, only eat a little, with the bad appetite when you’re sick. That is not the problem. The big problem is, they do not even eat it at all after they got well. I do not understand why myself. We love kaya but it just happens to stay stuck in my fridge forever.

Therefore I’m going to take it out of its misery and put it to some good use. I am going to make


Pandan Kaya Frosted Cupcakes

When I look at the recipe from Nic, I found that it was for 12 muffin tins. All I have was a 6 cup muffin tray that fits in snugly in my mini oven, which you all know quite well; therefore I halved everything, which I think, did not work out that well. I got the same problem again when I added in the flour and found it too dry, I wonder what am I doing wrong considering it a deja-vu, since I had the same problem with my Chocolate Chip ‘Orange’ Cookie. Anyway, I was compelled to use orange juice again but then it struck me that it would not go well with pandan kaya that I would be using. So I guess I would just use milk, which I have to brew from the milk powder; I ran out of fresh milk. Then when I scooped it into my muffin tray, I found I can only make up to 5. I wondered why again.

Next, when I scooped in the kaya, the lazy me had just grab the nearest possible thing in sight, my chopstick, to swirl it and I nearly messed it up. Anyhow, it ended up not bad looking. I guess it was not that attractive as the pandan kaya had a very light green colour which does not really stand out like how nutella would have. Nonetheless, it looks sweet. There are even some with swirl of sticky kaya remaining on the top! The cupcake is soft cake texture with a hint of pandan. Real nice. Thanks to Nic for a very versatile and adaptable recipe.

Pardon the conversions as I do not know how to halve 3/4 cup. Use your imagination.

70g butter, softened
1.5/4 cup white sugar 1 egg
1 egg white
1/4 tsp vanilla
3 tbsp milk
66 g ap flour
Pinch of salt
1 tsp baking powder
Pandan kaya

Grease 5 holes of the muffin tray with butter.
Cream together butter and sugar until light.
Add in eggs one at a time, until fully incorporated. Add vanilla.
Preheat oven to 160C
In a bowl, mix in flour, salt and baking powder then stir it into batter and mix until uniform.
Add in milk and stir till incorporate.
Fill up the muffin tray bout 3/4 full each with batter.
Top each cake with 1 tsp kaya and swirl it in with a toothpick (if you’re wiser).
Bake for 20 minutes.
Remove to a wire rack to cool completely.

Make 5 sweet looking muffins.

Update: Get the round up over at winosandfoodies. Enjoy!

Friday, November 18, 2005

Curing An Insomnia

I went to bed at 5 am today, yes indeed; it’s sort of a normal time for this student-having-long-holidays to sleep. The problem, I mixed up my sleeping time so much, I had trouble falling asleep. Imagine that!

I rolled here and there and my mind kept running around with all sorts of food. Such gluttony you must say, but it is actually due to the fact that I’m hungry since my late dinner just now.

By 10 am, after turning here and there on the bed, read some books, then back to bed and continued turning here and there, then played a little ps2, and back to bed for you-know-what and then finally I gave up and came online.

I met J online much to my delight. He pitied me and came over to accompany me. Then he got hooked on the ps2 and it just struck me to do the most therapeutic thing to calm myself – baking!

I ran through my list of to-bake/cook, yes I have a long one which I kept on accumulating but had yet to try out. My eyes locked onto something that was loved by everyone of all time – chocolate chip cookie.

Before this, I had a taste of the most wonderful chocolate chip cookie ever which was baked by my Nanny’s daughter for her beloved son. It was so addictive, my Godsister and I could not keep our hands off it. It was that sinfully delicious. Then I had begged her for the recipe and she kindly emailed me once she got back to Jakarta. I baked it and found it was nowhere near hers but still not too bad a cookie. At that time, I haven’t mastered my 20 year old oven yet, and burnt quite a number of cookies.

After about 2 years of experimenting with my oven, a lot more recently due to my interest in food flaring up, I had finally understood that small little old oven of mine.

The first batch of cookies came out and after a slight cooling; I took over to J with a mug of brewed milk powder. He took an enormous bite and then gave a resounding YUM!

Chocolate Chip ‘Orange’ Cookie

I actually altered the original recipe a lot. First, I had reduced the amount of butter because I found that 115grams of butter is too hard to measure (lazy me), and thought it would have been healthier anyway. To make it even more good, I split the flour and added in whole wheat flour and increased the amount of brown sugar ratio. Besides, they recipe called for 1 large US egg, and all I have is the Malaysian medium sized ones so I added another half.

During the time I added the flour in, the dough got too dry, much to my worry, and I decided to add some kind of liquid. I just ran out of fresh milk and it struck me, orange juice! I cut half an orange and juice it in. The smell definitely mixes well with the dough and I just had to lick my fingers. You know a cookie would be coming out good if you love the dough itself. LOL.


Anyhow, after tasting my end product, I decided it’s too sweet, it must be the sweetness from the orange juice that I had neglected, so if you’re trying this recipe out, do reduce the sugar. Milk might have been a better option since I could not really taste the orange in the cookie anyway. But J does not agree with me bout the sweetness and he is chomping the third cookie now as I blog. Maybe I have a sweet tooth so it’s up to you readers to adjust to your taste. Remember to scoop it further apart, as for me, due to my mini oven, I had to place them quite near and they ended up sticking to each other but I managed to break them up easily. It does produce a much rugged and homemade looking kind of cookies though.

Do contain the urge to over-bake; as the cookie does feel kind of soft even after browning, but after cooling it will be crunchy on the outside and chewy on the inside. Just my kind of favourite cookie!

1/4 cup granulated sugar
3/4 cup brown sugar
100 grams unsalted butter, cold, cut into 1/2-inch (1cm) pieces
1½ egg
1 tsp vanilla extract
1/2 tsp baking soda (sodium bicarbonate)
1 cup all-purpose flour
1/4 cup whole wheat flour
1/4 teaspoon salt
Juice of half an orange (1/4 cup)
1 1/2 cups semisweet chocolate chips

1 cup walnuts, toasted and chopped

Preheat to 150 C.
Cream the sugar and butter together until smooth. Then beat in the eggs and vanilla.
Stir together the flour, baking soda and salt and then mix them into the batter.
Squeeze in the half orange and stir to incorporate.
Mix in the chocolate chips and nuts.
Scoop 1 overflowing tablespoon of the cookie dough onto the baking tray, each about 2 inches apart ideally.
Bake for about 20-25 minutes, or until brown. Remove from the oven and cool on a wire rack.
Devour warm with a mug of milk.

Makes approximately 20 large (and I mean HUGE) cookies.

Mexican Girl

Saw this over at Funky Cookies and it had been circling around, over at Babe's and Foodcrazee's, so I decided to join in the fun. Here's my result:


You Are Mexican Food

Spicy yet dependable.
You pull punches, but people still love you.
What Kind of Food Are You?

Pretty true as I simply love Mexican food! I love it so much I had Mexican theme when I cooked for my 21st Birthday Bash. Might blog bout it someday.

Tuesday, November 15, 2005

Yet Another Cheesecake

I can’t seem to get over the chocolate and cheese love affair. Maybe I could have put cheese in a better limelight featuring it entirely in a cake. Therefore I took the opportunity of an occasion to surprise J.

J loves cheese. He adores cake. Cheesecake is then his greatest vice. I made this cheesecake especially for him, and had given him the liberty to do whatever he wants with it. He had chosen to devour it all by himself. Little did I know, I had given him his most powerful temptation. The poor boy managed to finish the whole cake himself in two days. Imagine that!


Lemon Sour cream Cheesecake

Not too bad a recipe but I had found that the amount of lemon is not distinct enough. Therefore I had increased the amount of lemon in the following recipe. My cake sank a lot after removing from the oven but luckily the top did not crack at all. This time the base is much better than the previous chocolate cheesecake but overall, we both found that we enjoyed the chocolate cheese affair more. Maybe we had indeed converted.

Base:
80g Marie Biscuits (crushed/grinded)50g Butter

Cheese Filling:
250g Cream cheese (1 block Philadelphia Cream Cheese)
25g Butter
½ lemon zest
1 tbsp lemon juice
2 egg yolks
20g sugar

30g corn flour
100g sour cream

1 egg white
30g sugar
1 tsp lemon juice


For the base, melt the butter and then mix into the crushed biscuits. Pressed it into an 8 inch round cake tin. Refrigerate till needed.

Beat the cream cheese and butter together. Then add in lemon zest and the lemon juice. Slowly beat in one egg yolk at a time. Then add in the sugar. Beat till creamy.

Stir in corn flour till well combined.
Stir in sour cream till well blended.

In a clean bowl, whip egg white, sugar and lemon juice till stiff peak. Stir into the cheese mixture and stir till well incorporated.

Pour onto the prepared base and bake in a water bath for 1 hour.
Let rest in the oven a few minutes after and then remove to let cool. Refrigerate for at least 5 hours before serving.

Serves 4-6 (In this case it served 1. LOL)

* Malaysia * Good Food * Recipes * Travel *Reviews * Asia *