We have moved to thamjiak.com! Please use the search box there to find your current post ->

Tham Jiak: For Indulgence
Tham Jiak means in some way "love to eat" in Hokkien. I am a Malaysian Hokkien and truly love to eat.
Showing posts with label For Indulgence. Show all posts

Saturday, January 24, 2009

Bribing with Cookies

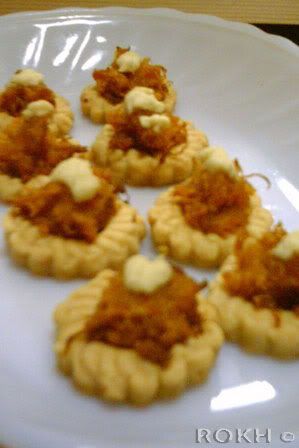
I cannot believe it! Tomorrow is the last day of the Chinese Lunar calendar! I am going to leave for my dearest hometown wee early tomorrow morning along with aunty and cousins, and I can’t wait. Though counting up to tomorrow have been anxious, then turn to stress, then turn to excitement and then now anticipation. I can’t wait to drink my Pho Pho’s heart-stopping duck soup and wrap pieces after pieces after pieces after pieces of lettuce around my all-time-favourite Pho Pho’s jiu hu char. I can't wait to toss the Yee Sang with everyone up so high half of it end up on the table. I can’t wait to casually walk into my Lai Ma’s house again and mention casually that I haven’t had lunch, I hope the same trick works again, but then again, I don’t need a trick to have my Lai Ma pushing food to me. Moreover this year I am armed with New Year cookies for her as well! Hah! It does sound like I am bringing a container of cookies in exchange for a mouth-watering feast, I would say this is such a good deal, agree?

I have baked more goodies after my initial kick-off Chinese New Year baking and finally chosen to remake Green Pea cookies in batches for giveaways because it was oh-so-tasty and not too tedious to make. I mentioned that Peanut cookies seemed like a new cookie for Chinese New Year but oh boy was I wrong, Lily reminisced making these with her grandmother, only that the original called for lard! I stand corrected but I might try again to say these Green Pea cookies should be newer in generation, as I could not recall it before the appearance of Peanut cookies during Chinese New Year, and some even claimed that it was a variation of the traditional Peanut cookies. Correct me if I am wrong again! I do not know what the Green Pea cookies represent in Chinese in comparison to other more obvious cookies, if anyone does know, do let me know too!

As for now, pardon the short post, I need to get ready, pack my bag and head north to celebrate in gluttony. By the way, Gong Xi Fa Cai!

Green Pea Cookies

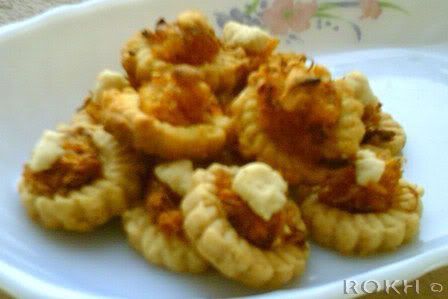
When I made my first batch, I found that it was too sweet, and so I went about researching on more recipes around the wonderful blogosphere and came about to my own measurement below. Also, on the first time I bought the green peas, it was the Jusco selection packet, that comes in 180g and it seem the green peas do look slightly smaller than the usual snack ones. The cookie came out so fragrant, I bought the same packets for my subsequent bakes! Note that these came salted so I omit the salt in the recipe. Also make sure you grind the green pea fine enough for the melt-in-mouth cookies. Similarly to the Peanut cookies, you should add the oil bit by bit until the dough comes together. This time I was a bit lazy and skipped the egg glazing steps, thus my cookies look pale but it still taste oh-so-good. This time I also learnt from the Peanut cookies bakes and used 1 teaspoon to shape my cookies and it came out just the right size to pop into the mouth.

180g ground green pea cookies
180g all-purpose flour (sifted)
80g icing sugar
80 - 100g oil
1/4 tsp salt (omit if green peas are salted)

1 egg lightly beaten for glaze (optional)

Mix the ground green peas, sifted flour, icing sugar and salt (if using) together till well combined
Slowly add in the oil and mix till a pliable dough is formed
Shape them into balls or use a 1 teaspoon to shape it, and then line it on a tray
Brush egg wash on top of each cookie (optional)
Bake at 180C for 15-20 minutes

Make approximately 84 cookies

Wednesday, January 14, 2009

Finally, Initially

Way long ago initially, I wanted to blog about my gastronomic adventure in Japan I haven’t. Then initially I wanted to do a roundup of the blog for 2008, and that did not happen either. Than it reminds me that initially I wanted to make many things for 1984 and friends’ Christmas Eve party but that did not happen either, though I did manage to make hummus and cupcakes, blog entry to follow, wish I hope would indeed happen on day. So all that initially aside, they have to wait, as I am going to make way for a more appropriate post at hand – Chinese New year bakes, which I had way way long ago initially, I’m talking about few years back here, wanted to bake which now I finally did!

To me the new year has yet to actually start, due to the impending Chinese New Year, it still feel like I am in the counting down mode to wrap up the year-has-been, please tell me I am not the only one, at least not the only Chinese. At first CNY still seemed pretty far away to me, but when I started to plan out some CNY bakes, it dawned onto me that it was only about 2 weeks away. Ah, so much to do, rather so much to bake yet so little time.

Anyway, what brought me into finally baking cookies for this important Chinese festival? That question brings to the story of a dear friend, M. She messaged me one day on a link to a mixer which she was contemplating to purchase in order to do some CNY baking; she chose to ask me because she knew I was a sort-of-baking-and-cooking aficionado, which then renewed the interest in me. I have always, wanted to bake for CNY but have not kick my lazy butt hard enough to really do it as because (insert overused excuses here) so this time thanks to M, I seized the opportunity and proposed to her to have a baking session together! Aha, that would bring this lazy tham jiak to really stick to the plan; she has a baking date to stick to!

So fast forward to the following weekend, I was lugging two big bags of ka-chang (Cantonese dialect’s multi-purpose word for utensils/equipments/anything that you use to do something), to M’s home and then we got started on our project. There were two bakes that day as each of us chose one recipe to attempt.

M chose her many-attempts-since-last-year Dragon Cookies, which she had not yet manage to achieve her ultimate one, which were supposed to be creamy , slightly soft, melt in your mouth yet having a bit of a crunch on first bite kind, if I understood her correctly. I can’t help but to mention here that the batch she baked the day before which she added banana essence due to one recipe which called for it, and a word of advice from both of us here, do not attempt to put banana essence in your Dragon Cookies! It is not a banana cookie, end of explanation. I guess I was her lucky star as finally, that very day that I am there with her baking the cookies she finally achieved her ultimate Dragon Cookie!

M’s Ultimate Dragon Cookies

Note that for this recipe, you would need a cookie press to shape it. Also M had noted that she had tried before with plastic press which has less desirable results especially if the dough is not soft enough, therefore she prefer the metal one that she is using now.

One important thing to understand about making these cookies is the balance between the baking time and the oven temperature. Our first batch was slightly over-baked and really puffed up. After tasting we found that it had a texture of similarity to kuih bangkit, where we even joked we had made a fusion of them, but ah that is not what we want for the ultimate Dragon Cookies, do we? So for the next batch we decided to bake in shorter time, about 10 minutes, and it came out perfect! The next next batch was slightly under-baked though, where we need to put in for few minutes more. Take note that we had the oven on slightly higher temperature due to its nature. Therefore we can only conclude that, the secret here in making the ultimate dragon cookies is to find the balance of time and temperature, also good recipe is a must, we would not want another banana essence case do we? Just remember that the cookies are suppose to be pale white even after baked. Good luck in trying, M tried since last year, so be like her, don’t give up! Also, we are now giving you a tried and true recipe below, so I bet it would save you at least a year, no?

150g butter (room temperature)
150g icing sugar
2 egg yolks
1 egg white
350g corn flour
30g milk powder
60g plain flour

Beat butter, icing sugar, egg yolks and egg white until creamy
Sift flour and milk powder together
Add flour mixture to the batter and mix till fully incorporated
Fill batter into cookie press and press out a line and then shape it (M shaped to S which to me is a sleeping Dragon, there are other who made a flying Dragon - curly long line)on a baking tray
Bake at 160-180C for 10-15 mins


Yields 120 cookies

As for me, I chose to make Peanut Cookies, which not too long ago, I would say about maybe 10 years back that in Malaysia here, it became a must-have for Chinese New Year. If anyone new since when these cookies got into the list please let me know. As a peanut fan myself, I just had to make it, even though I knew it is not going to be easy, as we would first need to dry fry the peanuts patiently and then remove the skins patiently. Preparation is bit tedious, some experience on how the dough should be like would be good, but other than that it is a fairly simple recipe, calling for minimal ingredients.

Peanut Cookies
Adapted from Do What I Like

First dry fry the peanuts over medium heat, remember to stir it religiously. Do not try to take shortcut by frying over high heat as it would result in the peanuts got burnt pretty quickly on the outside but has yet to fully cook on the inside. Then you have to take de-skin them, I do this by rubbing them against a basket, this would also need some work if you have not mastered the skill which enables you to do this in a jiffy. After that the peanuts is ready to be grind till fine.

But simple as the recipe may seem, it also requires some experience in understanding the dough. I added in all the oil and still found my mixture on the dry side but I tried by pressing them together and mould it into a 1/2 tablespoon for shape and it did work, but later noted to self that it seem a bit too big and might use a smaller one next round. But if you want an easier task where you can roll them into balls, you might need more oil to form the dough first. After researching and reading other’s experiences, it seemed that the quantity of oil needed depended also on how oily your peanuts were naturally. Therefore, slowly add in the oil until the dough is able to mould when pressed, or slightly more oil if you need to roll and shape them. These cookies came out with the melt-in-the-mouth texture, with some crunch due to the added chopped peanuts (I crushed them with a rolling pin; before that I tried to smash them against the counter which resulted in them flying everywhere, sorry M). I gave some to Q to try which she said that it tasted rich (even when I did not put enough oil) and she even asked if I have added peanut butter, ah, so it means I have achieved the creamy texture as well. Overall this is a good recipe, if you want full creamy kind then you might want to omit the chopped peanuts, and also remember to take note on the oil ratio.

200g ground peanut
200g flour
1/2 tsp baking powder
100g icing sugar
1/4 tsp salt
100g - 150g crushed peanuts
100g-150g peanut oil/corn oil

Egg wash:1 egg yolk lightly beaten with 1 tsp water

Put all the peanuts into a wok and dry fry over low heat till crunchy
Remove the skin then grind till fineSieve flour and baking powder together
Mix the flour mixture, ground peanut powder, icing sugar and salt together till well combined
Add in the crushed peanuts and mix well (if you are using)
Slowly add in the peanut oil and mix till a pliable dough is formed (see note above
Shape them into balls or like use a 1/2 tablespoon to shape it, and then line it on a tray
Brush egg wash on top of each cookie
Bake at 165C for 15-20 minutes or till golden brown

Yields 35 cookies (for the 1/2 tablespoon size)

I would say the project has been quite successful for Peanut Cookies first attempt and the achievement of the ultimate Dragon Cookies. I am even contemplating to do second round of Peanut Cookies with some tweaks that I have learnt, oh well, we shall see if this lazy tham jiak will get around to that (psst, which might be next CNY!). Still, I think I deserved a pat on the head for finally meeting one of my initially-s, that is baking for CNY! Not to forget one pat for M as well for her perseverance!

Wednesday, November 28, 2007

Man of the House

Oh boy, am I glad I finally have the time to sit down and write. I barely had time to breath nowadays, sneaking only time in betweens to read my favourite blogs, flitting in and out like a busy bee. Well, all this is because I am packing the house (more like throwing out garbage), selling what I deem not needed, arranging where to put the rest of the boxes, tits tats of furnitures and my many BIG boxes of kitchen appliances, utensils, gadgets and I don’t even want go there now, ha-ha. This is what happen when a cook decide to shift. Again you ask, when just a year more ago I told you I moved into a new neighbourhood. Yes again, this time, I am moving into my own apartment! Yay! J and I had bought an apartment somewhere in the heart of PJ, which I can only officially move in most likely next year, so I have to unload a lot of things now. It is taking up my every weekend, and most of my free weekdays. Then there is the loan, the legal stuff, the call here and there and everything else. In short, it is really exhausting.

Nevertheless, today I was lucky to be release early from a work training today, therefore this post. I have been meaning to post is since the beginning of this month, which was my dad’s birthday. Yes my dad, the pillar of my house and the foundation of my family.

Every dad is special to every little girl, just like how my dad is. Since the day I was born, he had never really raise his voice on me, not to mention laid hands on me. But he had his ways to keep us (my sister and I) in check, his “because I say so” and his silent treatments. No matter how though, I always see through his scheme. I am the little girl of the house, hardheaded at most times but usually using her charms to manja (pamper) her way through his heart. Whenever he tried to put up his steel manner, I would manja if I ever see there is a chance to get what I want (opportunity sighting is learnt throughout the years of living together), so I usually end up with what I want. But I had never abuse this power though, cause at times I know there are many things that even the best charm can never change or get.

My dad is in someway whom we like to tease in Malaysia, China-man, which actually loosely translated to the same style of the ancient Chinese people’s thinking, but not necessarily meaning it in a bad way. He was strict and conservative in his sense, protective towards his only two daughters, and manly about his house rules. Anyway, as my sister and I grew older, he had learnt to take off his protective net, and let us roam ourselves out in the world. So far, as he is always nearby, traveling forthnighly back to Taiping, we always find chance to come out for a dinner during Sunday nights, just like how we used to do as a family those days. During our Taiping days, we always go out for a full fledged Chinese dinner on Sunday night, its like a ritual. Then we would always go to the same restaurant again and again until we are so bored of it we would change to another, and then the vicious cycle begin again. Anyway, no matter what, I love you, dad!

So back to dad and his birthday, this year, mum insist that all of us go back to Taiping to celebrate. So of we all drove back in 3 separate cars, sis and her boyfriend, J and I and then dad, pardon us for the pollution, but as I told you, my mum insisted. Oh well, since she had came up in our numerous occasions, we all agreed to head home. Then during one of our MSN sessions, yes my mum DO surf the net and chit chat on messengers, she casually mentioned that I should bake a cake for dad. It tugs at my heart, I badly wanted to, but I know time is not on my side. Anyhow, due to perseverance, I got up that early Saturday morning, after arriving the night before in Taiping after midnight, and got over to my Nanny’s house and bake a cake, no so direct as I had to decide a recipe then from one of her old cookbooks, drove out to get the remaining missing ingredients (fortunately everywhere is near in Taiping), and came back to bake the


Chocolate Cake with Sliced Peaches

Yes it is a weird combination, I admit. It is the spur of the moment, desperate searching ways to spruce up a basic chocolate cake recipe to make it fit for a birthday celebration. The supermarket is out of cheese, and there are not much lovely fruits to choose from, so I resorted to a can of sliced peaches. Therefore, I had to improvise, I had to make do, and when I assemble it I pray it will work well together, which I can say it did, not exceptionally well as in why-we-never-think-of-this or what-a-wonder-combination kind, but just the alright, it-is-special-and-not-bad kind. But don’t be put off as the chocolate cake itself was good, coming from an old Singaporean cookbook, it was moist, delicious and just right, not too sweet, Asian style chocolate cake. Definitely a must try, and you can then use your own ways to spruce it up or just eat it plain or dip into the chocolate glaze (as I did with the chocolate cake pieces from the cut cake session), it was heavenly! Here goes, by the way I had halved the recipe to make an 8-inch cake.

100g chocolate (use the rich kind, I used Varlhona)

Shift together:
112g flour
1 tsp baking powder
Pinch of baking soda
28g cocoa

100g sugar
½ tsp baking soda
5 eggs, separated (I hope I got this right from memory, missed it out from my handcopy)
155g butter
¼ tin condense milk
1 tsp vanilla essense
1 tbsp brandy

Heat oven to 175 degrees.
Melt chocolate over steaming water (like the usual bain marie kind or my Nanny’s bowl-in-water-Asian-style kind)
Beat egg whites with half the sugar till fluffy. Add baking soda and beat till stiff but not dry.
beat butter and remaining sugar till light and fluffy (old books love this word)
Add condense milk by spoonful into the batter, beat well.
Add in melted chocolate bit by bit and beat till incorporated.
Add egg yolks, one at a time, beat well each time
Add vanilla and brandy, beat till blend.
Pour into the prepared and lined 8-inch pan.
Baked for bout 45-55 minutes (we had some trouble during baking, so do not have the exact right time) or till skewer comes out clean (use this method then)

Chocolate Glaze
Whipped up by me out of memory of many food blogs’ recipes I read and the remaining ingredients lying around

110g butter
110g chocolate

Melt them together over slow heat
Let cool a little and then scoop over chocolate cake

To assemble
Cut the cake in half (this was done skillfully by my Nanny)
Put the top side down, hiding the cracks if any
Slather chocolate icing liberally over the cake (cut side)
Arrange the slices of peach around it
Put the other cake slice over, cut side down
Pour the rest of the icing over the cake, forming a lovely overflowing chocolatey fountain
Nanny and I wish we could devour it then when the chocolate cake is dousing in the chocolate sauce, but we put it in the freezer instead and let it set

Then bring to the party and serves 8 people after a full Chinese course meal for sweet endings

Friday, December 08, 2006

While I am Away

The internet connection was down in my hotel now. So I started writing. I guess when you stop reading you start writing, a good theory no? Well, I have yet to fully gather all the picture and information on Bangkok food, so this post would be about something else. Though it is Bangkok related, as it is about the cookie I baked for J, for his breakfasts and munchies, while I am gone, for I won’t be able to go to our daily breakfasts and to catch him out to grab some food at odd hours.

Before this, J commented that I can bake good cakes but not cookies. I protested defiantly, after all I am a baker, I bake everything well! Or so I thought I did. So I baked a batch of my Godsister’s chocolate-walnut-oat-chocolate chip cookies, which unfortunately did not turn out too well just because I so happen to ran out of baking soda, and acting smart, I added in baking powder as substitute. The cookies turn out with good texture and all but it tasted slightly off to me and definitely very off to J. Later I found out that the baking soda in the recipe serves as not only rising agent but also to counter the acidity of cocoa powder, which explains the off taste of my cookies. Turns out my plans to change J’s mind on my cookies had just backfired and now he is even more sceptical of it.

I let the issue pass, and then the news came that I have to get to Bangkok for a business trip. I just wanted to make something for him while I am gone (though I did not expect it to last the entire trip knowing him, ha-ha), then the thought of regaining his faith on my cookies came to mind too. So I decided to bake him cookies for my away-trip, that’s what I call killing two birds with one stone.

This time I finally manage to bake a batch of cookies that could erase all the doubts on my cookies-baking skills. I had my housemate eating non-stop while I keep baking batches out, which I packed it and sneak out a batch for her too. J commented that the taste was great this time but he asked, “Why was it not crunchy?”

“It is supposed to be a chewy cookie! Don’t you like it?” I exclaimed.

He nods and continued munching, but I was not satisfied with it. I asked, “Is it that you like crunchy ones?” He nods again and continued munching. Being too late, and I am to fly off in a day, I vowed to bake a super-crunchy-and-addictive cookie when I come back from Bangkok. For now, these batch of cookies will do.


Chewy Chocolate Chunks Cookies

These cookies are really great, if you are looking for the chewy kinds. It would not be too chocolatey, in the absence of cocoa powder (which is why I can use baking powder here instead of baking soda), but chocolate enough with all the chocolate chunks. And the presence of salt brings out the flavours, though my salt was a bit coarse, but once a while biting on some salt was a welcome taste through all the sweetness.

I adapted this recipe from few sources and adjusted to what I have, such as my lack of baking soda and vanilla essence plus chopping up the remaining block of chocolate that I bought for my Y’s birthday cake. The chocolate chunks turn out to be really good, so much better than chocolate chips I believe. Try it, especially when the cookies are just out of the oven with the chocolate chunks in the gooey stage (yes, I was my housemate’s partner-in-crime on eating thorough the batches), after all this is a baker’s privilege. Enjoy!

1 cup all-purpose flour
1 cup whole wheat flour
½ cup rolled oats
2 tsp baking powder
1 tsp salt
175 gram butter
½ cup white sugar
¾ cup brown sugar
1 egg
1 cup chocolate chunks (200 gram)

Preheat oven to 180C and prepare baking sheet/pan, lightly butter.
Sift together all-purpose flour, baking powder and salt.
Then whisk together with whole wheat flour and oats.
In a large bowl, cream together butter and sugars, till light and airy.
Slowly add in the flour mixture till nearly combine.
Sitr in the chocolate chunks until well distributed.
Drop by teaspoonfuls onto prepared pan.
Bake at 180C for 12-18 minutes, until lightly browned.
Remove to wire rack to cool.

Makes about 36 cookies (included baker and partner’s stolen ones)

Sunday, November 19, 2006

Ultimate Chocolate Fix

Before this, during the summer at the other side of the world, the food blogging communities had gone into the frenzy of making icy desserts which got me totally hype up and weak to my knees. After all, living in this part of the world where it is practically summer everyday, it seems so right to have my icy treats all the time. I love the local favourite is of course such as ais kacang, sai mai lou and cendol, but sometimes, some dessert are just universal, yes, that is ice cream. I believe it is one dessert that no one can say no to, besides chocolate of course.

Well, after getting bombarded with all the ice creams, gelatos, sorbets and frozen yoghurts, I nearly succumb to getting an ice cream maker. I told myself, if I found one that I can afford, I would definitely buy it. Then one day, while out with J, at a fair, I saw a tiny one on promotion and nearly bought it but in the end got against it because it cannot fit into my mini refrigerator. I was nearly devastated. Then on that week itself, J’s mum wanted to exchange some gifts from the points she collected from the credit card, and voila, J chose that ice cream maker itself for me! I was totally ecstatic.


So it came, and I excitedly tried out a few recipes. My first banana ice cream, with my own adaptations of recipes came out too hard. I wouldn’t really call it ice cream though as I made it without cream, if you’re a long time reader, I mentioned before why I usually go for alternatives. Then the next one I tried was mango ice cream (I don’t really know what type so universally I will call it ice cream even without cream), using gelatin which has better texture. Then I tried one mango frozen yoghurt, which was also not so perfect yet.

Then I came across recipes for gelatos and I got hook instantly. No cream but still rich in its way. As gelatos are uncommon here, in fact I believe I never had one before, so I must try it! I was inspired by a recipe from The Traveler’s Lunchbox, where she explained what gelato is all about and then try out three different recipes for us to gape at. I chose the recipe that she and her husband decided was best.

Now the verdict from me? It was totally utterly (pardon the pun but it was necessary) delicious! Now I would understand what the craze about gelato is all about. The texture was just right with enough richness and feel, and the taste was incredible, the ultimate chocolate fix for any sudden crave. J mention it was a little bitter, but it was because of me as I had reduced the sugar level and used really dark chocolate due to my affinity for, of course chocolate, which I overlook as a personal preference. Nevertheless, J likes it too, and I promise to come up a vanilla (his favourite flavor) gelato soon. After this gelato, I believe I would never eat another chocolate ice cream again the same way.


Chocolate Gelato
Source: The Traveler’s Lunchbox

Although I had reduced the sugar content for my own version of chocolate heaven, I believe sticking to the original quantity below would be fine and safest for all to love. Anyhow, I believe it would be good. Oh ya, since my freezer was a quite strong, I would take the chocolate out and leave it for about 5 minutes (really impatiently) and then start digging in. Now I have to make another batch.

2 ounces fine-quality bittersweet chocolate
1 1/2 cups whole milk
1 cup evaporated milk
3/4 cup + 2 tablespoons superfine granulated sugar
1 cup Dutch cocoa powder, sifted
4 large egg yolkspinch salt

Coarsely chop chocolate.
In a saucepan, bring milk, evaporated milk and half the sugar to a simmer, stirrin till the sugar dissolved.
Remove pan from heat and add the cocoa powder and chocolate, whisking till all the chocolate is melted and the mixture is smooth.
Get ready a large bowl of ice and cold water.
In a bowl, beat the yolks and remaining sugar and salt with electric mixer till thick and pale.
Add hot chocolate mixture in a slow stream, whisking, and pour into saucepan.
Then cook the custard over moderately low heat, stirring constantly, until a thermometer registers 160°F (for me, I follow Melissa’s advice and go by instinct, watching not to let it boil)
Pour custard through a sieve into a metal bowl set in ice and cold water and cool.
Chill custard, covered until cold and preferably overnight.
Then freeze custard in an ice-cream maker.
Transfer to an airtight container and put in freezer to harden for several hours.

Yield: about 1 quart.

Thursday, September 21, 2006

Cupcakes-ful of Love


Been on a blogging hiatus and I guess there are no better reason than that I have been having fun and eating well. Oh yes, just had two weekends getaway, which the latest one have me and J on a gastronomic excursion up north, no prizes for guessing where it is. Yes you have said it, Penang the food haven of course. The place where all foodies claim to be the one place you must go to stuff your face if you are ever in Malaysia. The place where even when the Penangites themselves have long move out from their hometown, would still scuff at the every apparent mock-Penang-food they find, which are vastly available everywhere in Malaysia. I leave this now to your desires until the time I post up my honest tried and enjoyed reviews. Don’t frown yet, as I promise more than a few posts of my gastro-adventure coming soon, so bear with me for now as the focus should be on J.

Why you ask? Well, it was actually J’s birthday the past 12 days ago (so that’s the REAL reason behind the absence), and so we had been on a prolong celebration. The trip was actually meant for him, but being such a sweet guy, J went on with me to do what I love most instead, that is to EAT. Ah, such tham-jiak-ness to a point of no return. How did J put up with these? Could it be because I could churn out
his greatest weakness anytime, tempt him with many cakes, trying variations of our vices, reward him with surprises from time to time, whip up something when hunger strikes and also many of my little Chinese cookouts that I tried, reenacting my Ah Ma’s simple dishes.

Aside all these, all I know is that he is putting up his best with me and my food such as my camera frenzy, especially after I got the new one, where I need to take every picture of every food before consuming, as if it’s a ritual (does anyone out there have the same problem as me?). Sometimes he just wants to dig in straight but I had to warn him not to touch it until I take a decent shot (which takes quite a few tries) and sometimes I just had to give in and let the hungry boy down his food (especially when he is having the tham-jiak face on too). Then he also has to put up with certain degree of humiliation when I go around taking picture of people preparing food. You will sure hear more of these in my Penang-tales to come. In despites the once a while frowning, J had been a great partner in crime of my food endeavors. He had
came early in the morning to try my new bakes, bring me to breakfasts (my favourite) and try out new places (knowing well I would go into the picture-taking frenzy), search high and low for some place I read on some foodblog which I insist I must try (or die), and taking me to places he tried which was superb and he would want to share it with me. How much more wonderful can a foodie have from her partner?

Well, I would not be going into details of how J is, I guess the aforementioned of him and my tham-jiak-ness shall suffice. As for now, the cake, the one ultimately should have been the reason of this post. For J’s birthday I wanted to make something special, something different from my
1984’s cakes bake-out. So I decided to make him cupcakes adorn with letters on top to form a certain message (it shall be between us). No prize for guessing again, oh yes, I made it with chocolate and cheese. After all this two combination meant a lot to us.


Black Bottom Cupcakes with ‘Icing’ and Chocolate Love Letters
Adapted from David Lebovitz, at Leite’s Culinaria

I did some variations on the recipes, substituting chocolates with chopped Oreos that I happen to have extras on hand (ok I admit it’s a big purchase from my company’s warehouse sale). That move actually causes semi-disaster as the cheese portion overflow and was left with ugly bumps on the top of the cupcake due to the huge Oreos chunks. So I had to come up with last minute idea to cover it. I found that the cupcake was not really sweet (yes, I gobbled up one, but just because it split to half due to my clumsy hands when releasing it for the first time), as I had lessen the sugar amount in the original recipe. So I decided to sprinkle the cupcakes liberally with icing sugar till most of the ugly bumps are covered, and then adorn it with chocolate letters. When J tried it, he said it was the best (cup)cake I had ever bake (he had too) and then commented that it has frosting too! Then later I realize that he thought the cheeses was the frosting, as I had bought an inferior cream cheese instead (cause the shop I went to ran out of Philadelphia), so it was not cheesy enough to be noticeable. If I am ever to try this recipe again, I would make sure I buy good quality cheese, stick with chopped chocolates instead of Oreos, stick with the sugar ratio and would pour in the cheese right on top of the chocolate batter; instead of how I tried to spoon it in initially (you wouldn’t want to know how).

250g cream cheese
Scant 1/3 cup of granulated sugar
1 egg
60g of bittersweet chocolate, coarsely chop (which I had substitute with Oreos)

1 ½ cups all purpose flour
1 cup loosely packed light brown sugar
5 tbsps Dutch process cocoa powder
1 tsp baking soda
¼ tsp salt
1 cup water
1/3 cup olive oil
1 tbsp white/red vinegar
1 tsp vanilla extract

50g chocolate
25g of butter

Cheese Filling:
Beat together cream cheese, sugar and egg until smooth
Stir in the chopped chocolate pieces
Set aside

Cupcakes:
Preheat oven to 175C.
Butter a 12 cup muffin tin, (or like me bake it in two batches of 6 holes muffin tin, I had a small oven remember)
In medium bowl, sift flour, cocoa powder, baking soda and salt together.
Mix in the brown sugar.
In separate bowl, combine the water, oil, vinegar and vanilla.
Make a well in the center of the dry mixture, then stir in the wet mixture, till smooth
Do not overmix
Divide batter into the muffin holes, using a spoon, pour the cheese filling into the center of each cupcake, up to the brim
Bake for 20-25 minutes, or till top are golden brown and feel springy when pressed

Frosting (less than an hour before serving a birthday boy):
Melt the extra chocolate and butter in the microwave, stir once a while
Set aside and let cool
Pour it into a piping bag, or like me a ketchup squeeze bottle
Sift icing sugar on the cupcakes generously, till fully coat the top
Squeeze out the chocolates in letters you desire onto the icing sugars

Serving:
Stick one little candle on one of the cupcakes
‘Surprise’ the birthday boy
Sing the age-old song
Demand him to make a wish first before blowing out the candle
Then make him eat at least two cupcakes
Later sneak into the kitchen and try it out yourself

Serves a birthday boy, the baker and his family (12 cupcakes)

Friday, September 08, 2006

Smile!


Let’s see. Where do I start? There is so much to tell about a friend of mine, which is extraordinary in her own way. A girl I had mentioned quite a number of times in this blog. Y is a girl of exuberance. A girl who has a sweet smile on the face at all times. If I have to sum her up in one word, smile would would be it. She is smiling when she is walking, she is smiling when she is talking and she is even smiling when she is singing. Yes, she is a girl that smiles and brings joy to whoever she is with.

I have known Y more than 10 years ago, our passionate relationship kicks off when we both found ourselves sharing the same love for basketball. Then our friendship was forged deeper when we had the same class at 14, where we formed 1984; where we had tons and tons of laughter, excitement and adventure.

Our friendship was brought to the next level as we both came to the strange world of KL together, looking for more to life after the peaceful years of schooling and good food at the haven we are in. I call it fate that we both end up in the same college and soon end up as room mate, then to condo-cum-studio-mate and till now, housemate and not to forget, also my band mate. She had always been with me in KL, so to me; she is like my family here. I know I will always have someone to look to, to confide in and to share with, in times joy or turbulence.

I wish there is more I can tell about Y, as believe me she is not as simple as that. But somehow it seems impossible to mention everything about her. I can confidently say that she had always been a great friend, who never failed to be there for me when I needed and will always still be there for me even when I don’t need it. Confusing as it may seems, but believe me, she would understand what I mean. Love you Y, and have a great year ahead as a girl with the age-of-double-number. Cheers.

Extremely ChocolateY Chocolate ‘Kou
Adapted from Molly, Orangette


I made a cake for Y, specifically with all her preferences. I forgot to mention that she is a girl of acquired taste, extremely stubborn (which means if she does not like one thing, she would not ever change her mind bout it, no matter how much you try with all sorts of variation), a bit of a traditionalist and have a strong degree of liking to chocolate (who doesn’t?), and with certain specific no-no. She does not eat anything which is too bitter (thus degrade the idea she is addicted to chocolate, lets just add that she loves sweet things too), or anything with nuts, raisins or just anything round, hard or soft or whatsoever that appears in where she thinks it should not. Basically, she loves her food plain, simple and delicious. Since she has the weakness for chocolate, I decide to go all the way out to make an extremely decadent chocolate cake, which is flourless, and of course devoid of any trace of her no-nos.

I had been attracted to this cake since the day I read it at Orangette but have yet to find the occasion for such indulgence. Now this time, Y is going to be the victim, as the result of the cake is certainly addictive. When Y and my friends bit into it, they moaned with pleasure and I am not exaggerating here. In Y's words, she mentioned that the cake does not have the texture like regular cake at all but more to like ‘kou’ (as in kuih, like a marriage between pudding and cake), thus the name I christened it.

I would also recommend to use the best chocolate you can find (for me I would certainly go for bittersweet but since it is for Y, I used Vochelle cooking chocolate instead) and also the best butter, full fat kind, oh and the freshest egg around. I said this was good but I also said it was decadent remember.

200 g best-quality chocolate (bittersweet, unless for someone like Y)
200g full fat butter
220g granulated sugar
5 eggs
1 tbsp all purpose flour

Preheat oven to 180C.
Line an 8-inch round cake pan with foil.
Finely chop the chocolate and melt it with butter in a double boiler or microwave, stirring regularly.
Add sugar to the chocolate-butter mixture, beat well and set aside to cool.
Then add in the eggs one at a time, beat well with a wooden spoon at each addition (I like this traditional way, working my arms over the batter).
Add the flour and mix well.
Pour batter into the pan and bake for 25-35 minutes (mine took quite long, I covered the top half way through to avoid burning), until the top is slightly burnt but the middle is still jiggly.
Pull the cake out immediately with the foil and let it cool.
Then slowly peel away the foil, then be strong and store it away into the refrigerator for a at least a day (Molly said its better the day after and I’m not going to compromise this).
Before serving, take it out and decorate as desire to fit for a birthday girl (in my case a huge love to sweet Y).
Then slice thinly to indulge slowly (you have been warned).


Sunday, July 09, 2006

Sweet Goodbye

If you all have been following this blog, you would be familiar with L. Yes, she had been my guest blog a few times, writing about her food adventure in Penang and also her great research on Chee Cheong Fun that had caught so many’s attention. L came up to KL for internship the last 2 months, which started our food whore out there, once I wrote about it, many more in my archives yet to be publish, due to more food eating and enjoying life. It had certainly been fun when she’s up here. We got around quite a bit, pretty adventurous with our food endeavour, sometimes burning holes in our pockets, yet we would still go out and do it again.

Let me give some introduction about L. She had been one of my longest friend, and also a fellow 1984. I’ve known her since 11, and from there we just clicked and our friendship had grown since then till now. We have a lot in common, sharing interests in writing, books, dreams and of course food. It is not a wonder we are so close.

Anyway, we had a mini farewell for her last Tuesday at our new home, with our housemates and a few close friends. She promised to leave a goodbye note here, which I have yet to receive from her, and would update when I do. We had steamboat party, which has the usual array fresh food, and clear soup which would then later be turn to tom yam to finish it off.

When I got home from work (oh, yes I started, it was great), I quickly got to the kitchen to make dessert for the party. Guess what I will be making? It’s bread pudding. This dessert is easy; one can prepare before the party starts, leave it in the fridge and bout 1 hour near to the end, take out the bread pudding and bake it, then serve right out of the oven. This is one time I made something with my ‘own’ recipe, adapting from here and there, and since I am making it specially for L, I am naming it

Farewell Bread Pudding

I had about half a loaf left on apricot and raisins bread that I bought last week for my daily alone breakfasts. After a few days, I got tired of it and chuck it into the fridge. Therefore came the inspiration to use up this bread when the party came. This is actually the Gardenia Toast 'em fruit breads, if you live in Malaysia you’ll know which one, and it can be bought just about anywhere. They are good to eat just like that but I love it especially when toasted, with a good cup of coffee. Now, I found out that making it into this pudding was really good as well. Browsing through various recipes, I encountered most using whip cream, which if you had notice, does not ever appear in my recipes. Not to say I do not like it, maybe it’s the high fat content, maybe it’s the unavailability and also maybe it’s expensive. Therefore I had to adapt and fine alternative. To me, evaporated milk would be good, thick milky taste yet light and slightly creamy. This following recipe is my adaptation from few recipes, which I just go with hunch this time with the milk ratios, since I did not use cream and phew, it turned out great. At first it would seem to wet but trust me, once baked, all the liquid will absorb into the bread, making it pudding like. During baking it would puff up so nicely making one happy, but after cooling, it will shrink down. My heart nearly jump to my throat at the sight, there goes my dessert, as it also looked really burnt on the top and sides. There is no turning back for me as everyone at the steamboat table is waiting. There you have it, the adrenaline rush of a first try, serving to a bunch of people. Despite the hard look, once you spoon on it, it is actually soft inside, while crusty on the outside. The sugar topping gives it a deeper taste, some guessed it was gula Melaka, and with some hint of cinnamon. No one guessed the presence of alcohol, but I’m sure that is where the complex flavour came from. My first try and all my guests are happy about dessert, though it took some initial coaxing to try, as all of them have never tried bread pudding before. One of them even expected a flan instead. Well, a nearly empty dessert bowl signifies success I guess.

8 slices day old bread
3 tbsp butter melted

3 eggs
1 cup evaporated milk
1 cup low fat milk
4 tbsp of sugar
½ rsp vanilla essence
½ tsp cinnamon

½ cup raisins (I used a little lesser because my bread came with raisins)
4 tbsp brandy

2 tbsp fine jaggery powder (or fine brown sugar or palm sugar)

Soak the raisins in the brandy for at bout 30 minutes
Melt butter in microwave, or on the stove
Use a spoon and slowly swirl and coat all the bread slices with butter
Trim off the sides if the bread (not necessary white clean, a little crusts would give a crunch)
Then cut it into about 8 triangles each slice, I did not care bout getting it really uniform, just about the same size
Reserve triangles from two side slices of bread to one side
Then line the bread triangles in two rows, slightly overlapping one another in a glass oven proof dish (I used an oval dish about 12 cm width, 5 cm thick, just use one big enough to accommodate all the bread and some room for puffing up)
Cream together eggs, milk, sugar, vanilla and cinnamon until bubbly
Then pour in the raisins and all the liquid and mix well
Slowly, pour this custard mixture onto the bread slices
Take the reserve bread slices and chuck it in at all the sides, with the crusts facing outwards, lining next to each other
Put the dish into the refrigerator and let it soak for about an hour
Preheat the oven to 180 C
Take the dish out and then sprinkle the jaggery powder all over the bread top
Bake the bread for 45 minutes

Serves 8-10 party people


Friday, June 02, 2006

Self-employed in the Kitchen

J had started work today, leaving me this unemployed (starting work in July) girl alone. So I decided to be self-employed in the kitchen instead. Before this, besides hunting for job, we had been enjoying life; hence you see my lack of cooking/baking and more of scouring for food. Now it is time for me to fire back up my culinary skills.

My internet was down because we did not pay the phone bill. Yea, shame on me, but it just somehow slipped my mind. So I had no chance to surf around for recipes. That’s a habit of mine; looking through foodblogs in search of some inspiring recipes despite all these while I had been piling up on it.

So today with no internet, I finally look through my to-do list. It amazes me how much recipes I had saved up, with the sincere heart and hunger to make them. I was attracted by many recipes (well it is love at second sight since I had first saved them here), but the thing is, I do not have lots of essential ingredients in my pantry right now. For instance, milk or yoghurt or buttermilk or brown sugar is out. That practically cancels out most of the dessert recipes. I’m feeling sugar high right now, so I am just looking through this section. I chance upon this recip, from the baker which I had saved in my to-do list for as long as I couldn’t remember. LOL.

Well, this recipe took my attention the second time because it is flourless and butter-less! Now this is what I call a dessert for the weight watchers. Oh yes, and it’s a cookie recipe, which the baker decides would fare much better as cupcakes. So I decided to make these mini cupcakes. boy, was it good! It was like the heaven for chocolate lovers. It is crunchy at the top and thick and gooey in the middle. The nuts lend a good crunch to the entire cake texture. Now you chocolate lovers out there, who need a fix but want to watch the waistline, go make a batch yourselves. Due to the resulting look of the cakes, I decide to name it


Mini Molten Chocolate Lava Cakes

The recipe is fairly easy. Reading the instructions I was worried at first how it would come together with just two egg whites as the liquid ingredient, but surprisingly it binds well, not too sticky to handle and the ‘dough’ taste yummy! (Yes I am a bad habit cook that loves to taste things that she cooks). Some additional steps that I added was, first toasting the walnuts for better taste and then sifting the sugar and cocoa for lighter and more uniform batter. Before baking it in my muffin pan, I cut out the baking paper to roughly line the holes because with all the sugar in the dough, it is bound to stick like madness, and I am thankful I did this step, as it helps tremendously in taking out the mini cakes with the shape still intact. I think if you have cupcake cases, it is a good time to use them here. Besides, I had split the recipe in half, because I have so little to feed and I am worried I might finish off the whole batch! Oh and I feel that the sugar amount can be further reduce by ¼ and it would be perfect, more chocolatey and less sweet, the way I would really like it.

6 tbps unsweetened Dutch-process cocoa powder
1 1/4 cups confectioners’ sugar
pinch of salt

1/2 tbps vanilla
2 large egg whites

1 cups walnuts (toasted at 200 for 5 minutes then coarsely chopped)

Preheat oven to 350F/180C
Sift together cocoa powder, confectioners sugar, and salt in a bowl
Combine the liquids, vanilla and egg whites in a bowl
Slowly add the liquids into the dry mixture, beating at low speed with an electric mixer
Then beat the batter at medium speed till glossy
Stir in the walnuts
Line the muffin pan with baking papers/cups
Spoon about two heaped tablespoon of batter into the cup
Bake in oven for 20 minutes, till it looks like molten lava

Makes 6 mini cakes

Saturday, May 27, 2006

Happy Birthday KC!

KC is someone I might say I get to know due to fate. When I first came to KL to study, I came with a 1984, and then we bunked in a Convent senior from basketball team, temporary until we find a place to settle on. Then, KC was my senior’s boyfriend, therefore we get to know each other. From there, after shifting, we sort of keep in contact loosely until I shift over here to our place now, he so happen to have broke up, needed a place to shift and voila, he became our housemate once again.

As a friend, KC is amazing. He will do anything at all for his friends, always there whenever any of us needed help. He took care of me and my fellow 1984 housemate like sisters, protective and loving. We three in the house had once even named ourselves family.

Well, last monday was our dear KC birthday, I had decided to bake him a cake, although I know he does not really like one, but well, what’s a birthday without a cake. So, as I had put it at the weekly drools for so long, I decided to make Swee San’s

Carrot Cake with Cream Cheese Frosting

I made a few changes due to the unavailability of some stuff, and also due to a hunch to make things come together after certain changes. Ah, you bakers out there would understand.

At first look of the recipe, I had decided that the amount of sugar is too much, so I cut down quite an amount, and besides, we could not get white sugar in Tesco, imagine that, so we bought more of the brown sugar. I warn that even my amount of sugar is too sweet to my liking. Cut down more if you don’t want to have diabetes. Since having more brown sugar than white (in oppose to original recipe), I worry it would be too wet, thus I mixed all-purpose flour to the cake flour, in hope to make it drier, tell me if I’m wrong. Then, as Swee say, the corn flour addition is to make the cake fluffier and softer; I’m getting texture crazy here. I had also change the cream cheese frosting bit, since I don’t have enough butter, I added more cheese, partly also because I love cheese, so I want it to be more cheesy.

Anyhow, a few flops happened. First after baking at designated time and the toothpick came out clean in the middle. I took it out. Once cool, I remove from pan and found the sides all sticky and gooey and superbly sweet. All the sugar somehow formed a candy there. So I cut the sides all off and made a mess, with craters here and there. One lesson learnt: ONLY cut the cake once it is completely cooled! Then another mistake came with my impatience. Once the cake is semi-cooled, I attempted to frost the cake, partly because I’m impatient and partly it is late and I just want to get it done with. That is when disaster strikes. The frosting started melting as I starting spreading it. It became too hard to handle, steaming down the side. Second lesson learnt, ha-ha. I stopped at once, salvage what I can back to the rest of the frosting and chuck it into the fridge. After chilling few hours (yes I have yet to sleep), I frosted it with more luck, but sadly found the frosting with residue of icing sugar. Sigh; there goes my first cake frosting.

Ingredients
1 cup vegetable oil
500g brown sugar
200g coarse sugar
3 eggs

3 cups sliced carrots (2 large or 6 medium)
1 ½ cup coarsely chopped/bashed walnuts (roasted in 200C for 10minutes)

Sift:
1 cup all-purpose flour
1 1/2 cups (375g) cake flour minus 1tbsp
1tbsp corn flour
2 tsp baking powder
1/2 teaspoon bicarbonate of soda
1 teaspoons mixed spice

Method:
Preheat oven to 180-190C
Grease deep 23cm (9 inch) round loose-based cake pan (line base with baking paper if you do not have loose-base one)
Beat oil, sugar and eggs until thick and creamy
Transfer mixture to large bowl
Stir in carrot and chopped walnuts
Then mix in sifted dry ingredients little by little till incorporate
Pour mixture into prepared pan, bake in moderate oven about 1 1/4 hours
Cover cake loosely with foil halfway through cooking
Stand cake 5 minutes; turn onto wire rack to cool.
Spread with cream cheese frosting and decorate as desired.

Cream cheese frosting:
25 g butter
120g cream cheese, softened
250g icing sugar mixture

Method:
Beat butter and cream cheese until light and fluffy
Gradually beat in icing sugar bit by bit

Thursday, April 13, 2006

A Cheesy Reward

Yesterday was the day I’m supposed to stay at home and hit the books. My final exam is just around the corner, and I have yet to start on my revision. It took me whole day to really start firing up. Once a while I would sneak into the net and surf the food-blogosphere, to torture myself with all the yummy food out there. I stumbled upon a recipe at Jennifer’s blog, Fallen Souffle, which immediately made me think of J. Yes, you got it right, to think of J, it has to be of cheese and something cake-like. His secret vice. It was Jennifer’s quick and easy Mini Cream Cheese Tarts that had caught my attention.

J and I were both “studying” at our own home, and only to meet at night. Besides the though of rewarding him for his hard work, I also remembered promising him a cake since it had been a long time he had indulged. We nearly went to a local cake shop few weeks ago, but it was too late and the shop is closed for the night. Thus I promised to make for him next time. So here is how I came up with my slightly tweaked version, which I called the

Cream Cheese Bites

I changed the recipe a bit to suit my taste and my pantry of course. First, I used considerably lesser sugar because I do not want it too be too sweet, it might drown the cheesiness out. Then, since I do not have any wafers, I decided to use the idea of regular cheese cake base, by crushing up oats crackers (this was what I have in stock, you can use anything else, like maybe the usual digestive biscuits), and then press it together as base. Lastly, I do not have any tangy jam to put on top of my cheese bites so I forego it, though I really think it would had been a really nice addition. After baking, the cheese bites puffed up, with one cracked up, and then when taken out, it fell a little. Be careful when removing it as it is really soft right out of the oven, which I had disfigured some of it.

225g softened cream cheese
½ cup sugar (or less)
1 egg
1tsp vanilla essence

6 oat crackers/biscuits

Preheat oven to 180C.
Coarsely grind oat biscuits till grainy, then press it into the muffin holes. (I used the back of a glass to compact it)
Then, cream together the cheese and sugar.
Add egg and vanilla essence, mix till incorporated.
Spoon onto the prepared oat base in the muffin tin.
Bake for approximately 20 minutes until set.
Allow it to cool down and refrigerated for better taste.
Then munch on!

Thursday, March 23, 2006

CCC Craze

It is always good to be able to dig up my old archive to share with you guys. During the time I started this lovely blog of mine, I was in my term holidays. That was went I did lots of baking and cooking, and sharing it here. Now that time does not allow me to do so, I have continued religiously drooled over many food blogs out there.

So, about digging into my archives, I usually cook, take picture and then store it in a folder in my computer along with the recipe. So far, I just notice this folder getting much larger than other picture folders I have.

There was this local food forum that I joined, named Jo’s Deli Bakery. Then there was once we made a meet up along with fellow Malaysians from the forum Kitchen Capers, that I always talked about. At the party, obviously a food party, everyone is to make something to bring there. Like how we local like to call it potluck. Then a lovely forum member made a wonderful chocolate cheese cake, which got everyone hooked and craving for one. So naturally, we demanded for the recipe and then forth started the phase, we called it, the CCC craze.

If you keep drooling over various chocolate cheesecakes from the same recipe, and keep on hearing people rave about it day in day out in the forum, there is only one natural course of action. Yes, you make one too, not just to answer the craving since the gathering day but also to see what is all the fuss about.

And I have to say, it is all worth the fuss! It is fairly easy to do, and simply delicious. It is hard for me to describe how good, you go try it and you tell me! This might even start a CCC craze in the blogosphere, who knows, as it is really tempting and the result is going to be an expanded waistline with a wide smile.

Alright let us now see what the fuss is all about but be forewarned, it might start you into a phase.


Chocolate Cheese Cake

Making the mixtures was really easy, but layering them was the problem. When I poured in the final chocolate mixture onto the cheese layer, I made mistake by pouring too much in the middle, then end up scrapping it all to the side, which in the end causing the side rim to have too much. Nevertheless, the effect was not bad; I got wave-like layers, which some people thought I did it on purpose.

I also found that I had to take longer baking time than suggested, then later I found out its because I used an 8-inch pan instead of 9. But I will still stick to 8-inch, because the height of the cake is just nice with the layers clearly shown, and of course, it means bigger portion in every slice. You won’t regret it.

Mixture A:
250g cream cheese
60g castor sugar
1 egg

Beat cream cheese with sugar until light and fluffy
Beat in egg until well incorporated
Set mixture aside

Mixture B:
180g butter
150g sugar
3 eggs
3 tbsp cocoa
120g flour
1 tsp baking powder
Pinch of salt


Beat butter and sugar together until light and fluffy
Beat in egg, one at a time until well incorporated into mixture
Sieve all the dried ingredients together
Fold it into the egg mixture

To assemble:
With an 8-inch cake pan, pour in half of mixture ‘B’, then all of mixture ‘A’, then remaining mixture ‘B’
Bake in preheat oven at 180C for 55-60 minutes (45-50 minutes for 9-inch pan) or until skewer comes out clean
Serve well chilled


Wednesday, December 07, 2005

Exploring My Origins: Egg Tarts


I am a Chinese, inside out. My mother and father, and both their father’s mother and so forth are all Chinese. In other words, I am a typical Chinese. My mother’s father, came directly from China, during the time many immigrants flocked here to seek a better life. Coincidently, my mother’s mother came to Malaysia in the same way, save maybe in a much later date. As for my father’s side, it was my great grandfather who also came from China to do business.

I am also, a Taiping ‘kia’ (the word is in Hokkien for child), inside out. I said this because both my parents were born and bred in Taiping, including my father’s mother. Same goes for me.

Taiping is a town located up north in Perak, Malaysia. The word itself Taiping meant “Eternal Peace”. As I remember from my studying of history, the name was given to signified the end of the feud between Ghee Hin and Hai San, two prominent gangster (like those in Hong Kong “ku wak chai” movies) at that time. Taiping was also known as “rain town” as it is the wettest town in Malaysia. I for one can testify to that when various times, my basketball practices and plays were canceled due to rainfall. Especially when it is the rainy season, the downpour is so huge; you cannot drive safely on the road. Anyway, I tried it and I swear, I felt like a blind man driving. Well, due to the wetness, we had a beautiful lake in town, with rain trees arching over the road, as they reached over for the water. Check it out over at Taiping Talk or Worldisround for wonderful pictures of my beloved home’s lake. This lake was a produce of the abandon tin ore mines. Quoted from NST:


“Often overlooked is the lake gardens' history. It is said to be the oldest lake gardens in Malaysia, opened to the public in 1880”

There is so much to talk about this hometown of mind, and I will bit by bit introduce it you readers. I had numerous pictures from Taiping, food especially, go figures, to share with you guys. I’ll be going back to Taiping this weekend, for my Grandmother’s birthday (I am also thinking of baking a cake for her, look out for it as it would be butterlees and milkless, my Grandma cannot stand dairy) and I promise to get more food pictures from town.

As for now, my subject is about my Chinese origins. I had intend to further explore food from my origins, due to inspiration from Barbara from Tigers & Strawberries, where she wrote a lot of thought provoking articles of how to appreciate Chinese cuisines and its various forms and arts.

So I had decided to make something created in Chinese cuisine, and came up with baking egg tarts. It was an absolute hit in my house. I referred to a recipe at KC yet again, and had modified the fillings. According to Wiki, egg tart is a type of pastry from Chinese cuisine. It was created during the time British colonized Hong Kong. SeaDragon from Café of the East had a nice write up bout how the word came about. You can also see the picture of how an egg tart looks like in Wiki, although the crust I made was not those flaky ones. I ran over the recipe to do the flaky crust and was at first afraid of the procedure of combining water and short dough together, something like how you would do puff pastry. Then dignified, I wanted to try it but then was once again put off, this time for the amount of butter involve! It doubles the amount I would have use for a normal crust, like those you would have in tarts. Therefore, I resort to making the pie crust instead.

Last time when I was young, I did not know how to enjoy egg tarts, maybe because my family seldom buys it anyway. Then came Portuguese egg tarts to town, these tarts are from Macao origin, neighbour to Hong Kong, and the crust was superbly puffy and the filling is extremely rich and thick. Alas, I have yet brave enough to make this favourite of mine, I might when one of these weekends I’m geared enough. Anyway, now that Portuguese egg tarts had ignited my interest in egg tarts, I decided to make one at home. Although, it would be completely different from my favourite type, normal crust with simple filling, I found this recipe a keeper as the crust was just at the right crunch and the filling was smooth and tasty, much unlike the watered down ones outside. Do give it a try, even with any pie crust you have. After all, it is just egg custard in pie crust. Ah, the beauty of simplicity.


Egg Tarts

I had discovered a really genius way to make the tart crust! Alright maybe not really genius or maybe everybody does it but it just came to me (the light bulb effect again) to use the rolling pin to flatten it first and then cut it out with a mug. Yes, you heard me right, a mug which you use to drink your hot cocoa from, as it would create a size just slightly smaller than the tart cases.


Remember to roll it just thin enough, press mug to the flatten dough, softly lift the cut out piece and place onto the tart case. Push up the sides to meet the ends. I also found that once baked, the crust will shrink slightly, therefore for my second batch, I had pinch the crust slightly higher than the sides and it will shrink to perfect size. Another reminder is to watch it while it baked so not to over done it resulting in cracks (it was told by a forum member). When done, the custard might be slightly jiggly in the middle, and not to worry as it will harden once cool.


Ingredients crust:
125g butter at room temperature
225g flour
1 egg white (leftover from the egg filling)
1 tsp vanilla essence


Method:
Sift the flour and then rub in the butter with your fingers till crumb-like.
Add egg and vanilla essence.
Then knead it to form dough.
Take a portion out of the dough, flatten it with a rolling pin.
Cut out in round shape, and press it into the tart moulds, using your fingers to push up the sides and evenly into the zig-zag shapes.
Preheat oven to 180C.
Bake the tart crust for 10mins.


Meanwhile get ready the egg filling:
80ml (1/3 C) water
80ml (1/3 C)ml fresh/UHT milk
4 tbsp sugar or to taste (depending on your milk sweetness)
juice from 1 lemon slice (1 tbsp lemon juice)
4 egg yolks and 3 egg whites


Method:
Put water and milk into saucepan and heat it till nearly boiled.
Then add in sugar and whisk it till dissolved.
Add the lemon juice and remove from stove, set aside to cool.
Beat the eats lightly and filter it through a sieve.
Combine the eggs with the prepare sugar and milk water, set aside.
Pour egg mixture into crust and bake at 180C for about 10 - 15mins.
Once cool enough, remove it from the cases with thongs (I just used my hands), it will dislodge easily
Place on the cooling rack.
Devour it while still slightly warm and be surprised how wonderful it is.


Makes 12 egg tarts


Saturday, November 26, 2005

IMBB/SHF: Cookie Swap

This month, Alberto’s IMBB and Jennifer’s SHF are having a joint event this month which is the virtual Cookie Swap! This is indeed a rare event for the union and coincidently it is my first time joining in both of these sensational events. Lucky me, as this would be an easier entry for me to handle both events in one!

After reading about this cookie swap, it just struck me to share to the world something traditional and truly Malaysian. I believe no other cookie fit into this description more than the famous Pineapple Tarts (or rather pineapple cookies).


These cookies are a must in most festive seasons in Malaysia especially Chinese New Year, which is a celebration of a new year according to the Chinese calendar. There are many ways shapes these Pineapple Tarts are made, either open tart shape (the one I made), roll up shape, ball shape, pineapple fruit shape or even most recent creative ones with cartoon icons. These cookies are usually served during CNY because in Chinese Hokkien dialect, the word pineapple (Wong Lai) has the same meaning as the ‘coming of prosperity’. Therefore they are considered auspicious cookies.

This had indeed been my all time favourite cookie during CNY celebration, and I can never keep my hands off them. I have heard various comments on how tough it is to make it but also how it these homemade ones can never ever be replace by those commercial ones. Therefore, I roll up my sleeves and brace the challenge for the world to share in this local joy of mine. Enjoy.


Pineapple Tarts

Making these cookies prove to be no easy feat as it needs extra attention and long hours at the kitchen. After making these, I now know why it cost a bomb to purchase it outside. I first made the fillings, where in the original recipe it calls for stirring continuously for 2 hours at the stove! I found it a crazy feat. So I decided to use my non-stick pan and just stir it occasionally while I prepare the dough. Do not worry if the pineapple fillings seem dry at first for it will sweat once you add in the sugar.

I love the kind of melt-in-the-mouth cookies to go with these but had failed to achieve it. This I suspect was due to over baking, where my first batch was slightly over browned in my naughty mini oven (the ever so famous) because I was busy making another batch with the cookie cutter and failed to monitor it. While another huge batch, I tried it with my gas oven (a huge oven of mine which is attached to the stove and uses the gas as heating element) which even after long time of baking, the cookies are still pale looking which ended up drying the pineapple filling instead. Next time, I should just stick to my mini oven and diligently watch over it. I found the baking time and heat a little too much from the recipe, therefore I changed it in the following recipe. I also find that, while cutting out your cookies, chill the remaining dough in the refrigerator for easy handling. Do not roll out the dough too thin else it would not stick to the cutter making it impossible to remove it nicely.


Pineapple filling:
2 med size pineapples, grated & drain off juices, retaining a bit of moisture
2 star anise
1 cinnamon stick
Sugar to taste (bout 100g)

Method:
1. Remove skin and black eyes from pineapple
2. Grate pineapple and squeeze out the juice.
3. Put pineapple into a non stick pan and cook.
4. Stir occasionally for about an hour.
5. Gradually, add sugar and cloves.
6. Cook for another 30 minutes or until it is dry and sticky.

Pastry Ingredients:
283g cookie flour (red rose flour)
28g sugar
184g butter
1 egg
Pinch of salt

Method:
1. Sieve flour, add salt and sugar and mix together
2. Rub butter into flour (use your fingers)
3. Beat egg lightly and add to the flour
4. Knead into a soft and sticky dough and leave it in the fridge for at least 1 hour.
5. Roll pastry to 1/4 inch thickness and cut out with cookie cutter.
6. Fill pineapple filling onto the cookie.
7. Bake in oven at 190 C for 15 to 25 minutes till golden brown.

Makes bout 75 auspicious cookies (if you can resist popping it into your mouth)


Update:
Check out first half of result at Domestic Goddess
Don't miss out the second half over at Il Forno

* Malaysia * Good Food * Recipes * Travel *Reviews * Asia *